Wednesday, April 20, 2011

Plain Slouch Hat

I decided to make a video. I know a lot of people come to my blog and look at my hats and think that they are too complicated. They really aren't. (well most of them aren't) I have looked online and I haven't found any really good videos on how to crochet a hat (that doesn't mean there aren't any good ones out there, just that I didn't find any in my search that covered everything needed) so I decided to make my own. Most of the ones I found are filmed from the side or from the front. I made a weird rig with coffee cans, duct tape, hangers, and a pen (lol) so I could get the camera to record my perspective. Hopefully this will help beginners. The music in the video is "Ash Koley" My friend Ben introduced me to their music and I immediately loved them. I needed music for the video because I cover so much and there was no way I could talk that fast enough to keep up with the video. If I didn't add music it would be 10 min. of silence. Not very entertaining lol. I really wanted to use their songs so I contacted them and asked permission. Ash replied and told me it was alright. You should check them out. They are really awesome :) Here is a link to the video.
For those of you who already know how to make hats and read a pattern, scroll down. I posted it here. Remember, if you use it please give me credit for the design :)


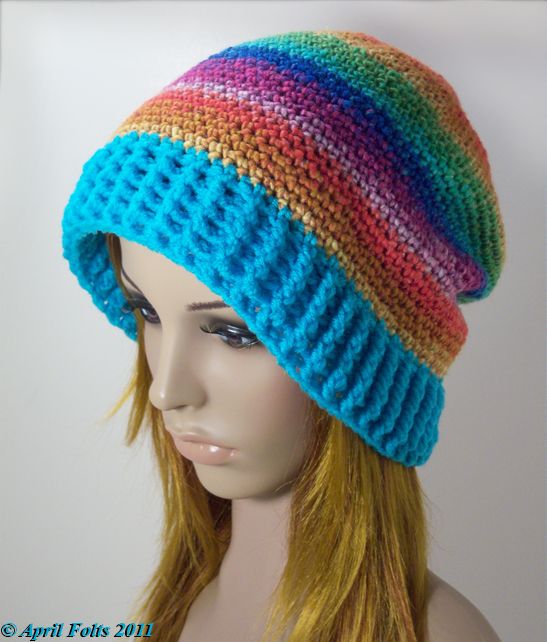
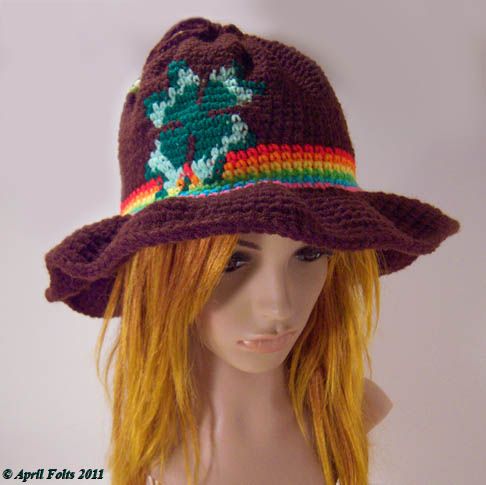
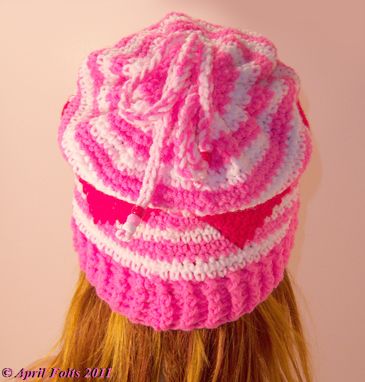
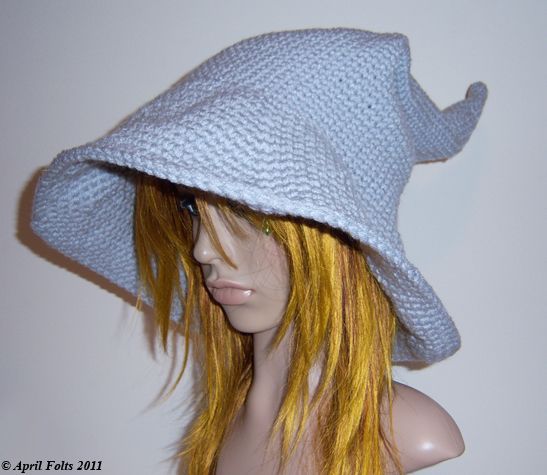
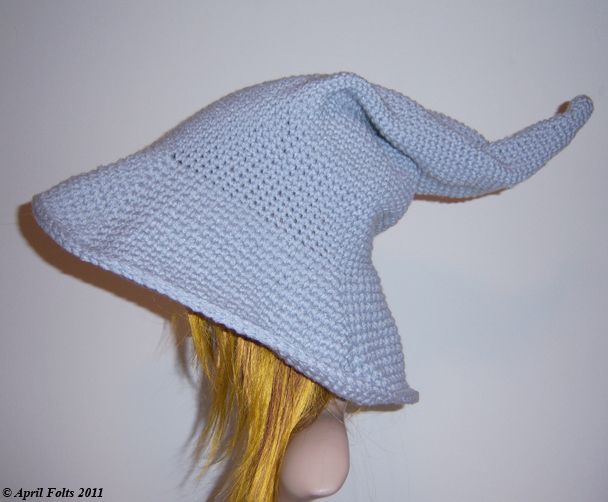
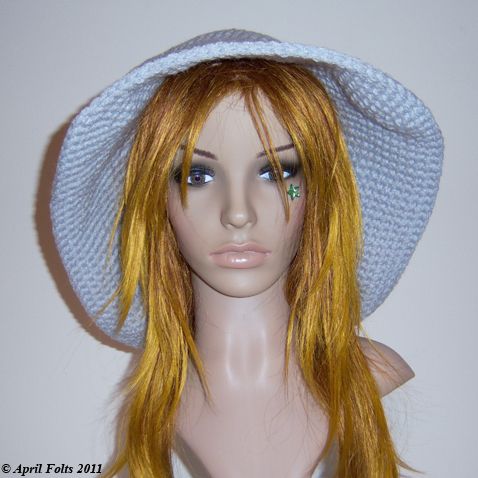
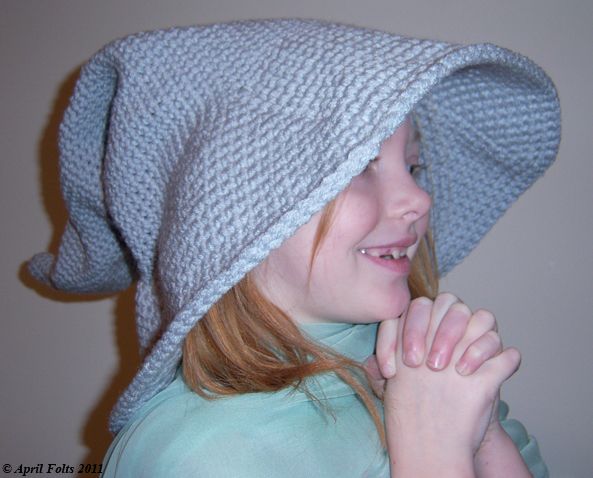
Plain Slouch Hat © April Folts 2011

Hook size: H

Gauge: 4 inches = 13 stitches and 14 rows

Yarn:
3.5 oz Bernat Mosaic psychedelic 4 ply 100% Acrylic Worsted Weight
a little bit of Red Heart Turqua 4 ply 100% Acrylic Worsted Weight

Abbreviations:

Ss: slip stitch
Sc: single crochet
Dc: double crochet
Fpdc: front post double crochet
Bpdc: back post double crochet
FO: Fasten off

This pattern is worked in the round with a marker. Do not join with a ss unless specified

With Psychedelic yarn form a magic circle
Rnd 1: 8 sc in ring (8)
Rnd 2: *2 sc in each sc* rep from * to * around (16)
Rnd 3: * 1 sc, 2 sc in next sc* rep from * to * around (24)
Rnd 4: * 2 sc, 2 sc in next sc* rep from * to * around (32)
Rnd 5: * 3 sc, 2 sc in next sc* rep from * to * around (40)
Rnd 6: * 4 sc, 2 sc in next sc* rep from * to * around (48)
Rnd 7: 1 sc in each sc around (48)
Rnd 8: * 5 sc, 2 sc in next sc* rep from * to * around (56)
Rnd 9: 1 sc in each sc around (56)
Rnd 10: * 6 sc, 2 sc in next sc* rep from * to * around (64)
Rnd 11: 1 sc in each sc around (64)
Rnd 12: * 7 sc, 2 sc in next sc* rep from * to * around (72)
Rnd 13: 1 sc in each sc around (72)
Rnd 14: * 8 sc, 2 sc in next sc* rep from * to * around (80)
Rnd 15-34: 1 sc in each sc around (80) (20 rounds)
At the end of rnd 34, switch colors to turqua and join with 1 ss
Rnd 35: 1 sc in each sc around, Join with 1 ss (80)
Rnd 36-40: ch 2, * 1 fpdc, 1 bpdc* rep from * to * around, Join with 1 ss (5 rounds)
FO and hide tails

Thursday, March 17, 2011

Shamrock Hat

I really wanted to design a hat with a 4 leaf clover on it. My family is mostly Irish so it feels good to make something in honor of them ;D Mostly I made it for my daughter though. She was really excited about Saint Patrick's Day so I wanted to make something special for her. This is what I came up with. What do you think? I have the pattern for $3 in my Etsy shop if anyone is interested. Happy Saint Patrick's Day!


Thursday, February 10, 2011

Valentine Convertible Hat *Free Pattern*

I really wanted to make something for Valentine's Day. I decided I wanted to make a hat with hearts going all around it. I dug out the graph paper and got to work. I figured I would go with my Convertible hat pattern and just add the hearts. I love hats where you can put your hair through the top. I can't get the hair on my mannequin to go through the top of the hat (It's just a wig). I have been sick so I didn't want to model looking all sickly lol but you can still pull your hair through if you like :) What do you think?


and here is the chart you can use with the Convertible Hat Pattern

Tuesday, February 8, 2011

Grey Wizard Hat

This was inspired by Gandalf's hat in The Lord of the Rings. Our whole family has an obsession with those movies (and books). My daughter was so excited when I told her I was going to make the hat. Now that the hat is done I think my husband has laid claim to it haha. I had a little trouble with the brim. I'll admit I just got lazy towards the end because the whole thing is single crochet and I just wanted to be done with it lol. I finished it and the brim bugged me so bad I ripped it out and re did it. Now I'm much happier with it ;D LOL lesson learned just do it right the 1st time so you don't end up with double the work later ;)
If you can't see the pictures right click on them and select view image.

If anyone is interested I have the pattern for sale in my Etsy Shop for $3

What do you think?


I also re-designed my blog. What do you think?

Tuesday, February 1, 2011

Crochet Valentine Rose with Picture Tutorial


I have wanted to crochet a rose for a while now but I just couldn't decide on how I wanted to do it. So I did some searching and I came across this wonderful video on YouTube

This lady made roses out of ribbons. I have now made a ton of ribbon roses and I have tweaked the instructions a little. When I followed the YouTube tutorial I got confused and at the end my flower fell apart. So I made a picture tutorial with my new alterations so hopefully that will clear up confusion. I used ribbon in the tutorial because it is easier to see what is going on.

With an H hook, Ranch Red 100% Acrylic Worsted Weight Red Heart Yarn, I chained 77, turned and sc in each chain across ch 1, then sc in each sc across. Repeat until you have 4 rows. (You should have a long rectangle that resembles a ribbon) Fasten off, and follow the picture tutorial for how to do the rest. It is easier with yarn I think because you can sew any pieces that slip with the same color yarn so it doesn't show up ;D

If you can't see all of the picture, right click on it and select view image. Or right click and save the image so you can enlarge it :D


What do you think?

Wednesday, January 26, 2011

Lembas Bread Leaf Wrapper (the Lord of the Rings)

I wanted to make something from the Lord of the Rings so bad. (I love those movies so much. It's an obsession hehe ;D ) I got the great idea to make leaf wraps for the Lembas Bread. I just thought it looked really cool. (Yah I'm a huge geek :P) Plus with Valentine's day coming up wouldn't that make an awesome gift wrap? ;) What do you think?

I used the picture on this site to make it, just so I could visually get the shape down since in the movie they didn't really show it all unwrapped or it flashed by so quickly I couldn't see.

Please refrain from the *it looks like male parts* jokes. Yes I know, but that is the shape it is supposed to be. It is a leaf that can wrap around to hold things, it needs to be long.
Thanks for looking :D


Lembas Bread Leaf Wrapper

© April Folts 2011

Hook size: H

Gauge: 4 inches = 13 stitches-14 rows

Abbreviations
Sc= single crochet
Ss= slip stitch
Ch= chain
Sc2tog= single crochet 2 together (or 1 dec stitch)
FO= Fasten off


Middle Leaf

Form a magic circle, ch 1
Row 1: 1 sc in ring, ch 1, turn (1)
Row 2: 2 sc in next sc, ch 1, turn (2)
Row 3: 2 sc in each sc, ch 1, turn (4)
Row 4: 4 sc, ch 1, turn (4)
Row 5: 2 sc in next sc, 2 sc, 2 sc in next sc, ch 1, turn (6)
Row 6: 6 sc, ch 1, turn
Row 7: 2 sc in next sc, 4 sc, 2 sc in next sc, ch 1, turn (8)
Row 8: 8 sc, ch 1, turn
Row 9: 2 sc in next sc, 6 sc, 2 sc in next sc, ch 1, turn (10)
Row 10: 10 sc, ch 1, turn
Row 11: 2 sc in next sc, 8 sc, 2 sc in next sc, ch 1, turn (12)
Row 12-19: 12 sc, ch 1, turn (8 rows)
Row 20: sc2tog, 8 sc, sc2tog, ch 1, turn (10)
Row 21-24: 10 sc, ch 1, turn (4 rows)
Row 25: sc2tog, 6 sc, sc2tog, ch 1, turn (8)
Row 26-28: 8 sc, ch 1, turn (3 rows)
Row 29: sc2tog, 4 sc, sc2tog, ch 1, turn (6)
Row 30 & 31: 6 sc, ch 1, turn (2 rows)
Row 32: sc2tog, 2 sc, sc2tog, ch 1, turn (4)
Row 33: 4 sc, ch 1, turn (4)
Row 34: sc2tog 2 times, ch 1, turn
Row 35: sc2tog 1 time, sc around entire piece, 1 ss, FO

Little Leaf (make 2)


Form a magic circle, ch 1
Row 1: 4 sc in ring, ch 1, turn (4)
Row 2: 2 sc in next sc, 2 sc in next sc, ch 1, turn (6)
Row 3: 2 sc in next sc, 4 sc in next sc, ch 1, turn (8)
Row 4: 2 sc in next sc, 6 sc in next sc, ch 1, turn (10)
Row 5: 2 sc in next sc, 8 sc in next sc, ch 1, turn (12)
Row 6: 2 sc in next sc, 10 sc in next sc, ch 1, turn (14)
Row 7: sc2tog, 10 sc, sc2tog, ch 1, turn (12)
Row 8-10: 12 sc, ch 1, turn (3 rows)
Row 11: sc2tog, 8 sc, sc2tog, ch 1, turn (10)
Row 12: sc2tog, 6 sc, sc2tog, ch 1, turn (8)
Row 13: sc2tog, 4 sc, sc2tog, ch 1, turn (6)
Row 14: sc2tog, 2 sc, sc2tog, ch 1, turn (4)
Row 15: sc2tog 2 times, ch 1, turn (2)
Row 16: sc2tog 1 time, ch 1, turn (1)
Sc around entire piece, 1 ss, FO

See picture for how to sew together

Thursday, January 20, 2011

Fashion Doll Mermaid, Clam Chair, and Goldfish Friend

My Daughter loves mermaids so it was all a matter of time before I ended up making one. I did a search and couldn't find any I liked. The tails were all weird, so I ended up making my own. Then I couldn't stop there. I made her a Clamshell Chair and of course her mermaid had to have a friend. (orange is my daughter's favorite color so I made a goldfish) Then when I was done I got to thinking. Have you ever seen a goth mermaid? So I just had to make one. It was so fun I made another one to join her. I used the Twilight dolls Victoria and Alice. (Vampire Mermaids lol)
If you can't see the whole picture either click on it or right click on it and select view picture. If anyone is interested I have the pattern in My Etsy Shop for $3.


My Husband bought me Roses last night! He is so sweet. So I had to play with them hehe. It's the photographer in me ;) I replaced the old picture with this one because I liked it better.


What do you think?