
NOTE: If everything goes well, I plan on making a web series. The first edition will be on how to crochet. I will just be covering basic stuff. Then I will move on to other crafty things. I am still a little nervous about being on camera, but I will give it a good try. Keep checking back if that is something that interests you :)
***UPDATE 8-12-13***
I tried recording the web series, but my daughter was too distracting. I am going to wait until she goes back to school to record it. I haven't abandoned this project. I know quite a few of you are looking forward to it, and I am excited too. Just a little bit longer. Sorry for the long wait.
*********************
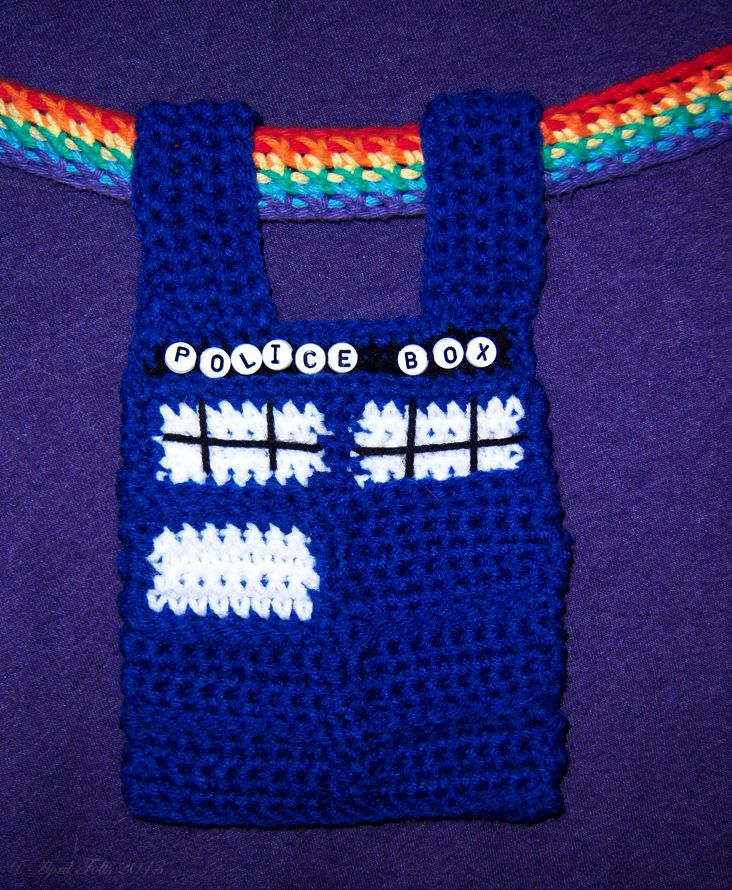
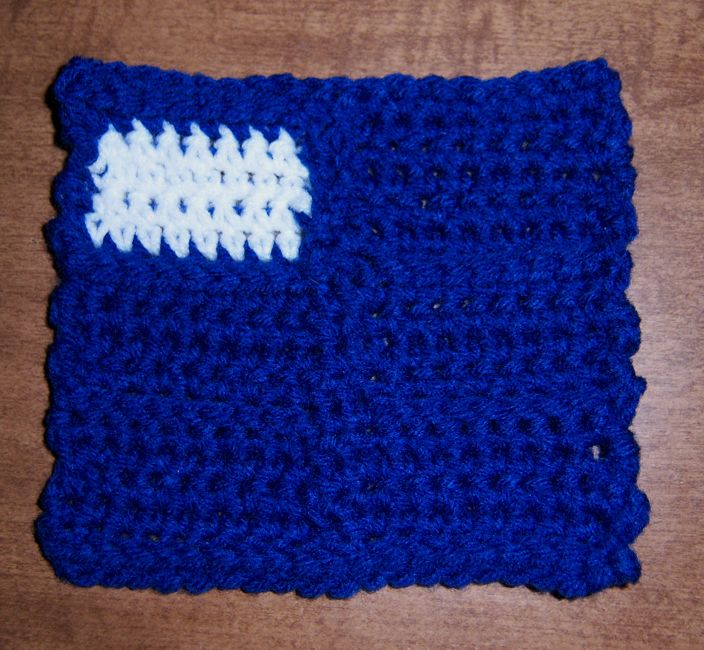
Police Box Belt Pocket
April Folts 2013
For personal use only If you are going to post pictures anywhere, please link back to me so I get credit for the pattern. Thanks :)
 Hook size: F
 Yarn: 100% acrylic, 4 ply, Worsted Weight, RedHeart Olympic Blue, White, and Black Yarn
STITCH EXPLANATION:
FpSc = Front Post Single Crochet
BpSc = Back Post Single Crochet
sc = Single Crochet
ch = Chain
Row = Row
Piece 1:
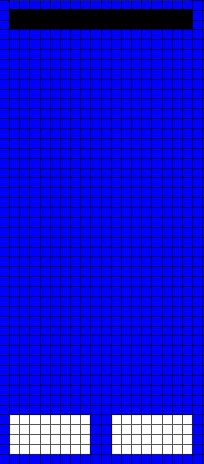
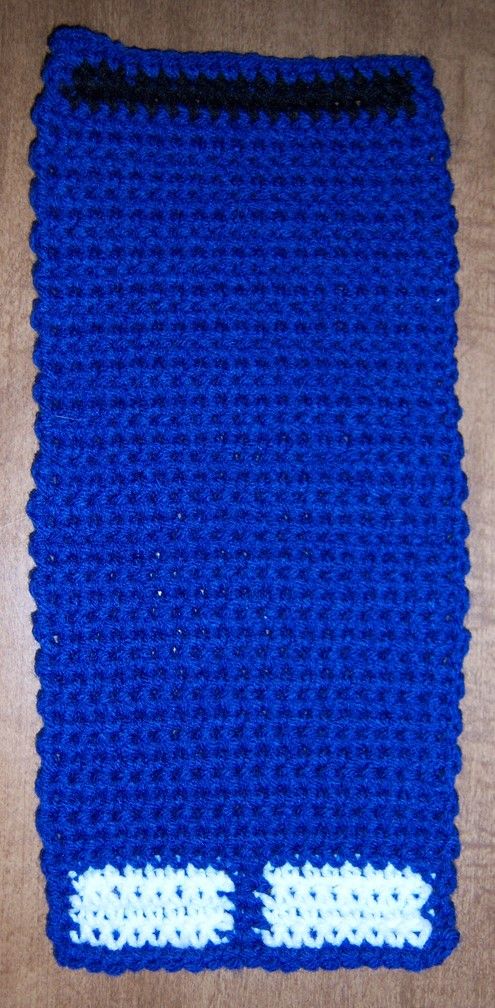
When complete, fold bottom up to just below the black at the top. Set aside until last piece is made. It would be easier to add the bead letters and black to the windows now, but you can do it at any time.

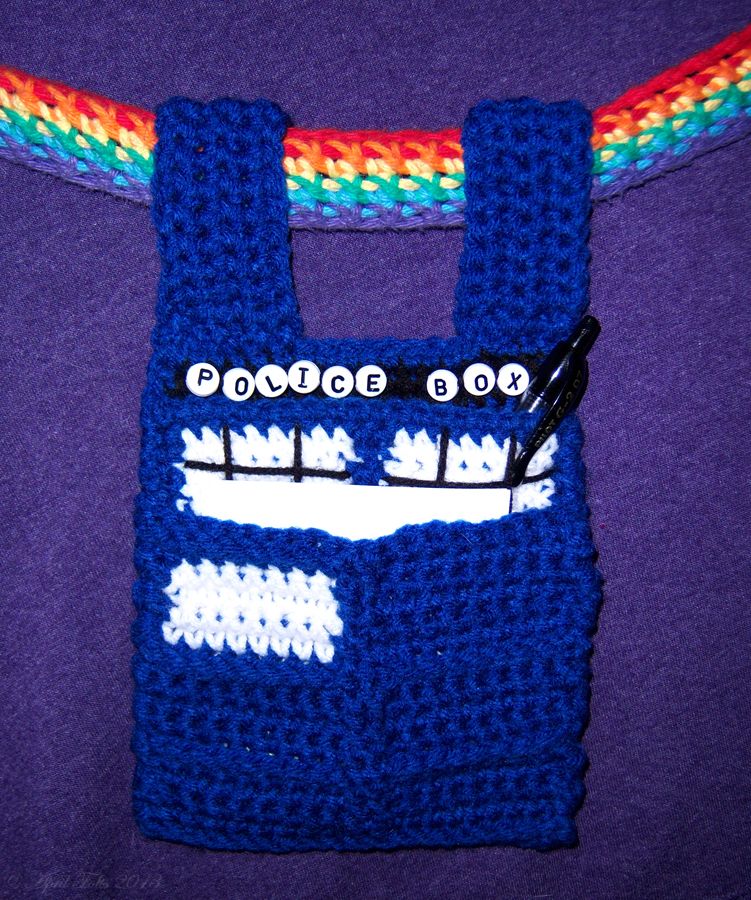
This picture might help with the outside pocket, but it isn’t necessary. It just gives you an idea of what you will be doing.
Piece 2 (Outside Pocket)
Note: It doesn’t really matter on the ends if the post is front or back, when you sew it together it doesn’t really show up. It is just a texture thing. Plus it is hard to do a post stitch on the ends let alone tell if it is front or back post.
Row 1: Ch 21, turn, 20 sc
Row 2: Ch 1, 20 FpSc, Ch 1, turn
Row 3: 1 FpSc, 8 sc, 2 FpSc, 8 sc, 1 FpSc, ch 1, turn
Row 4: 1 BpSc, 8 sc, 2 BpSc, 8 sc, 1 BpSc, ch 1, turn
Row 5: 1 FpSc, 8 sc, 2 FpSc, 8 sc, 1 FpSc, ch 1, turn
Row 6: 1 BpSc, 8 sc, 2 BpSc, 8 sc, 1 BpSc, ch 1, turn
Row 7: 9 BpSc, 2 FpSc, 9 BpSc, ch 1, turn
Row 8: 1 BpSc, 8 sc, 2 BpSc, 8 sc, 1 BpSc, ch 1, turn
Row 9: 1 FpSc, 8 sc, 2 FpSc, 8 sc, 1 FpSc, ch 1, turn
Row 10: 1 BpSc, 8 sc, 2 BpSc, 8 sc, 1 BpSc, ch 1, turn
Row 11: 1 FpSc, 8 sc, 2 FpSc, 8 sc, 1 FpSc, ch 1, turn
Row 12: 9 FpSc, 2 BpSc, 9 FpSc, ch 1, turn
Row 13: 1 BpSc, 8 sc, 2 FpSc, before pulling last loop through switch to white, 8 sc, before pulling up last loop, switch to blue, 1 FpSc, ch 1, turn
Row 14: 1 BpSc, before pulling up last loop, switch to white, 8 sc, before pulling up last loop, switch to blue, 2 BpSc, 8 sc, 1 BpSc, ch 1, turn
Row 15: 1 FpSc, 8 sc, 2 FpSc, before pulling up last loop, switch to white, 8 sc, before pulling up last loop, switch to blue, 1 FpSc, ch 1, turn
Row 16: 1 bpsc, before pulling up last loop, switch to white, 8 sc, before pulling up last loop, switch to blue, 2 BpSc, 8 sc, 1 bpsc, ch 1, turn
Row 17: 1 FpSc, 8 sc, 2 FpSc, 8 sc, 1 FpSc, ch 1, turn
Row 18: 1 BpSc, 8 sc, 2 BpSc, 8 sc, 1 BpSc
Straps (make 2)
Row 1: Ch 19, turn, 18 sc
Row 2-6: Ch 1, turn, 18 sc (5 rows)
Fold in half and sew to top.
Assembly: Place pocket right below the windows. Sew together around piece.