
Monday, November 13, 2017
Pictures not showing up
My mother passed away and I am now in the process of going through her things and moving. It is that time of year where I need to pay Photobucket (the site that hosts my pictures), but they changed their packages again and I can no longer afford to pay for the package that includes unlimited bandwidth. This means my account is going to be downgraded to a free account. After a certain amount of time the pictures will not work. After I am done moving and get settled in, I will try and find a solution to this problem. Until then you should be able to find pics on Raverly. I have most of my stuff on there. I'm sorry for the inconvenience. I just have so much to do right now, I can't fix this problem right away.
Monday, October 5, 2015
Little Fox Crochet Pattern
I made this little crochet stuffed fox for my daughter. When I was really young I remember watching a cartoon about a prince that visited other planets. Years later I found out that was The Little Prince, and that it was based off a book. I instantly fell in love with the story. The Fox was my favorite character. I wanted to share that with my daughter, but she has a really short attention span involving books. I decided to make this little fox while she was at school. I hid it, and then told her there was a surprise for her if she could get through the story. I read the story to her, and when I finished the Fox part, I got up and brought the fox to her. I told her that he wasn't tamed, and that she needed to tame him. So, now this little fox has his own bed next to hers, and she has been carrying him around everywhere. Hopefully, she will remember this when she is older :)
The Pattern is available for $5.50 in my Etsy Shop if you are interested.
What do you think?


Here is a link to the PDF of THE LITTLE PRINCE
The Pattern is available for $5.50 in my Etsy Shop if you are interested.
What do you think?
Here is a link to the PDF of THE LITTLE PRINCE
Friday, September 25, 2015
Totoro Free Crochet Pattern
I crocheted this Totoro for a friend a while back. I just now got around to typing the pattern up. Here is the Free Pattern if you want to make one.
Remember: For Personal Use Only.
If you post a pic online, link back to me. Share the love :)
What do you think?


Remember: For Personal Use Only.
If you post a pic online, link back to me. Share the love :)
What do you think?
Wednesday, September 23, 2015
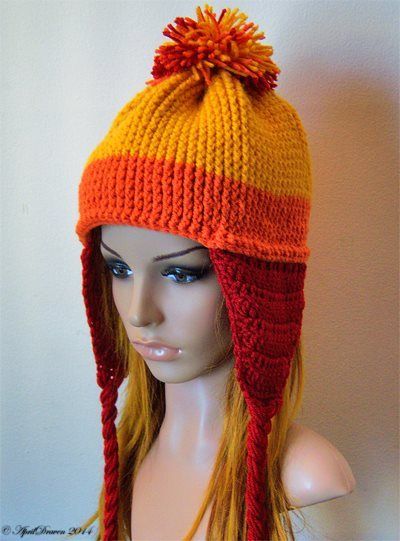
Jayne Cobb Inspired Hat Free Pattern
I wanted to show my Browncoat pride and make a Firefly hat, but since I also design patterns, I didn't want people thinking I was incapable of making a decent hat. Not everyone knows about Firefly/Serenity. Crazy, I know right! Since the original hat is Knit I had some playing around to do. I think I did a pretty good Fake Knit job ;) What do you think?
If you want to try to make one yourself, here is a link to the Free Pattern
Click Here Remember: This is for Personal Use only.
If you use this pattern and post it online, please link back to me and show some love :)
If you want to try to make one yourself, here is a link to the Free Pattern
Click Here Remember: This is for Personal Use only.
If you use this pattern and post it online, please link back to me and show some love :)
Tuesday, September 22, 2015
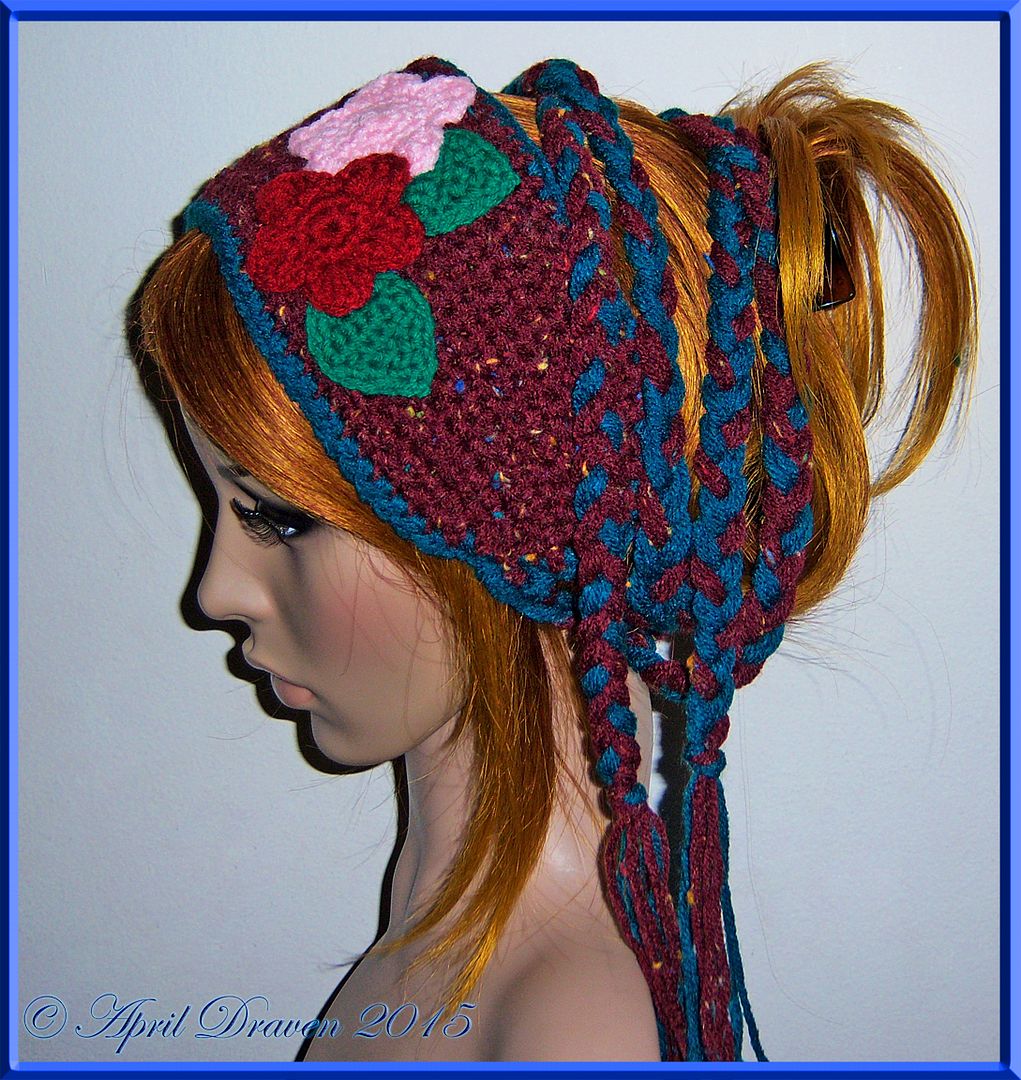
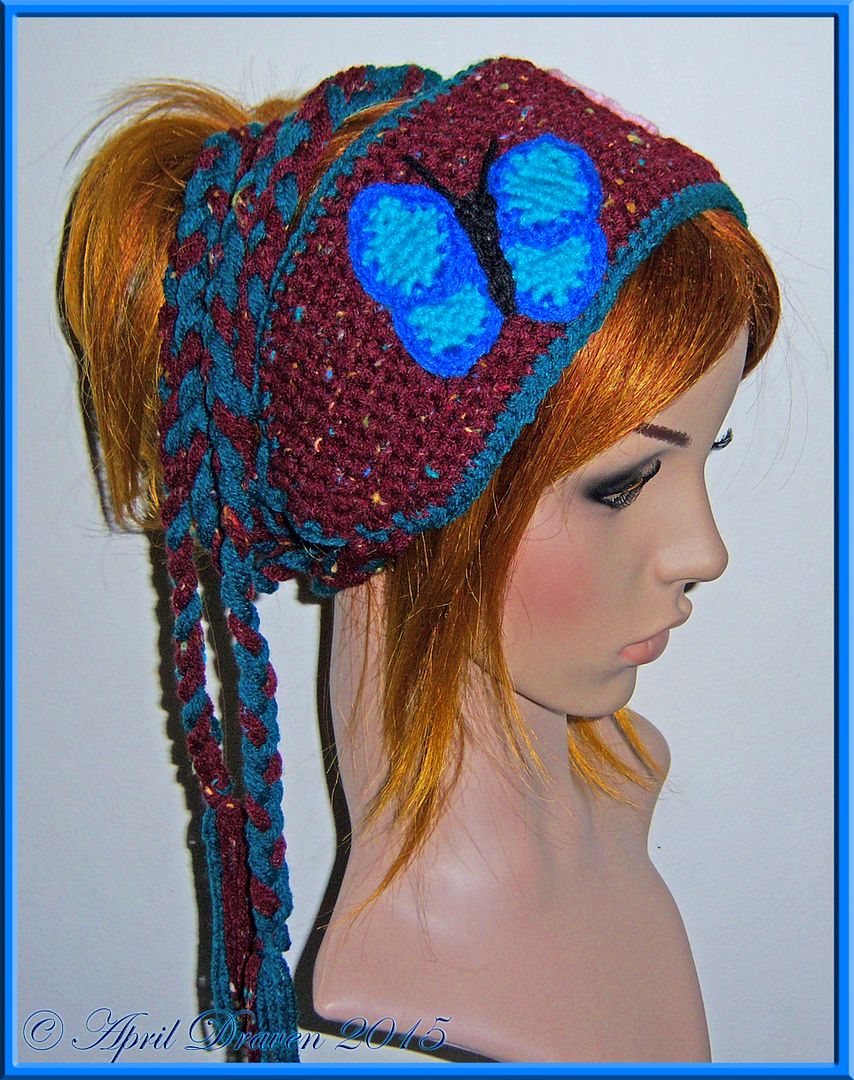
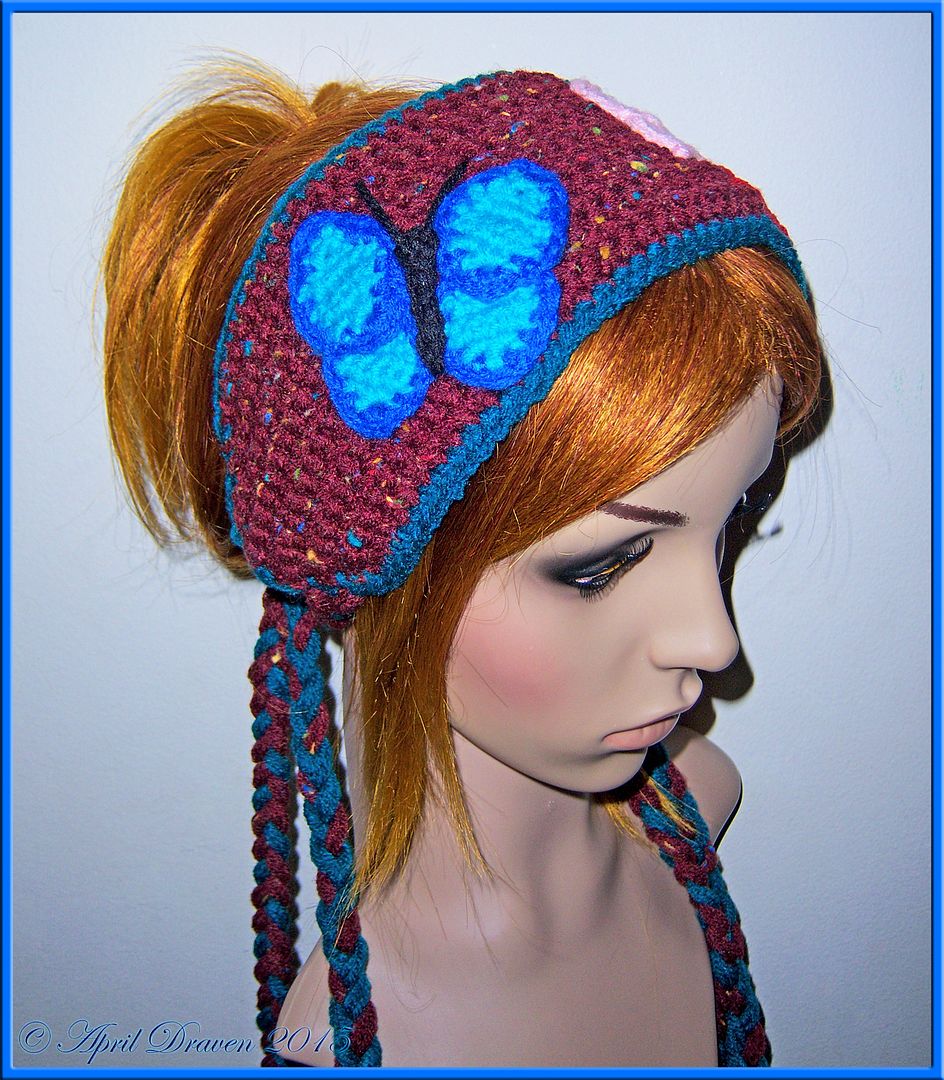
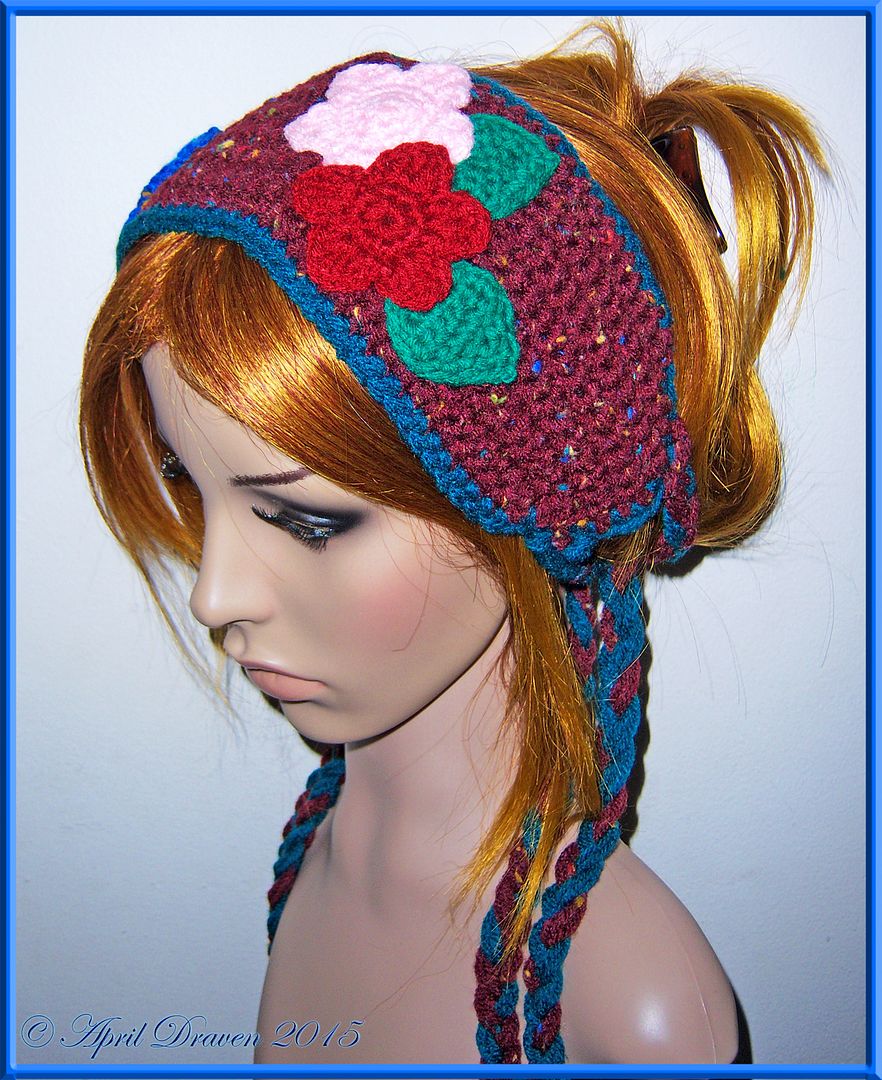
Blue Butterfly Crochet Headband
I wanted to try my hand at wearing fake dreads. So, of course I needed to make a Dreadband. The cool part is, it works for a regular headband too. Bonus! I haven't had the time to put dreads in yet, but I will post pics when I do. Expect more Headband/Dreadband patterns in the future. If you are interested in this pattern it is available for $3.00 in my Etsy Shop.
News: I opened a new shop where I am going to sell physical items and not patterns. It is pretty much just a place for me to sell stuff I make from time to time, crochet related or not. If you are interested, check it out here :) It is still new so, I don't have a lot in it yet. I will keep adding stuff though.
Side note: I will have 2 new FREE patterns soon. I am just waiting for my pattern testers to finish them, so keep checking back.
Thanks for looking! If you want to help out, share, share, share. It's good Karma ;)
Sunday, June 14, 2015
Minecraft Birthday Party ideas with Free Printables
My daughter was turning 11, and she wanted a Minecraft birthday party. I searched and searched the internet, trying to find something cheap. We have a very limited budget, and I didn't want to have to invest a ton of money into a party. Here is what I decided.
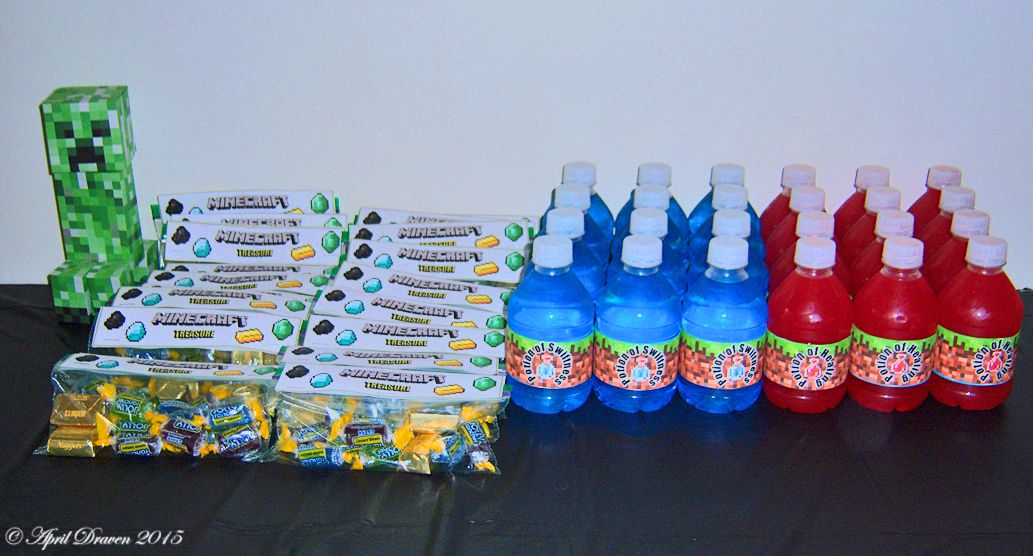
For activities I went to this site and printed off a few Minecraft characters. I used the mini ones because they seemed easier to assemble. I let the kids cut them out. I had paste and tape. Almost everyone used tape.
I found this site and printed off the "sticker" pages. I didn't make stickers though. I let the kids paste them to a piece of paper. I gave them crayons and let them draw/color their own minecraft scenes. That took care of the activities.
Next, I had to make party favors. I made some rice krispies treats that looked like minecraft blocks. Chocolate for the bottom and regular colored green for the top.
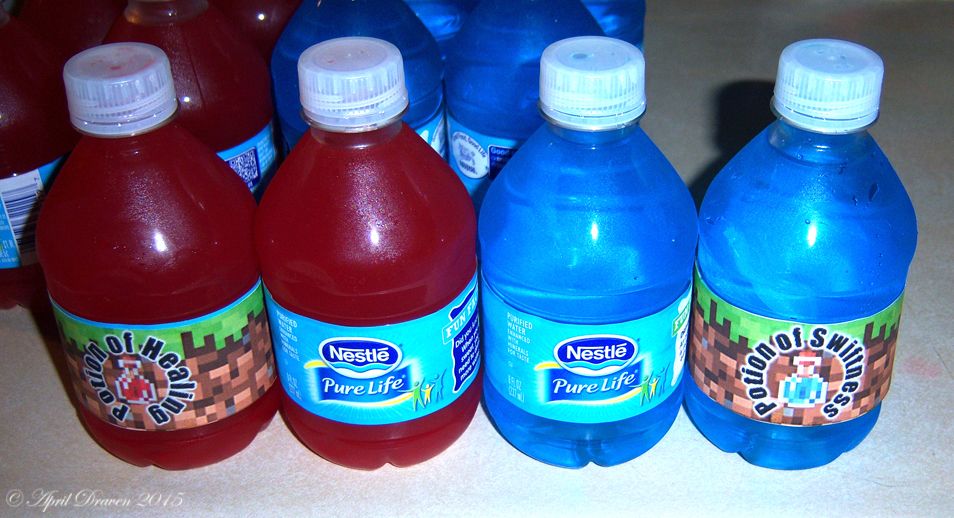
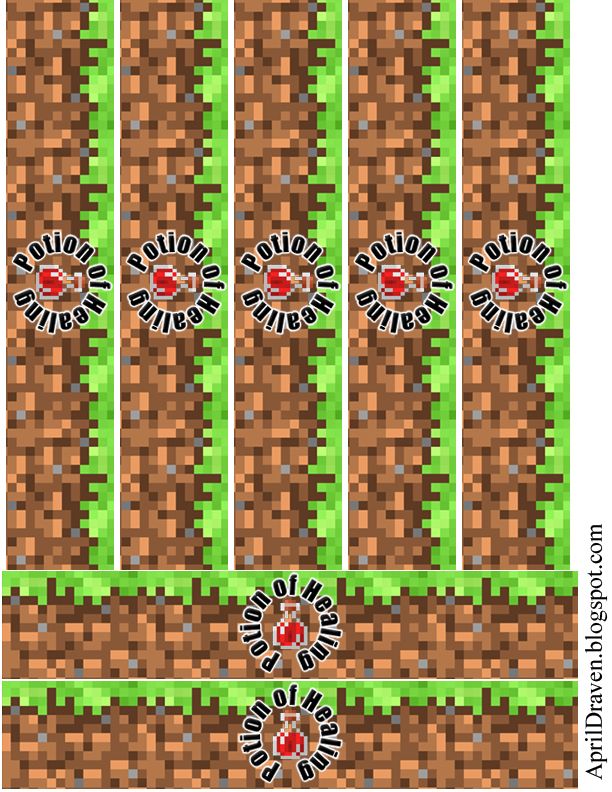
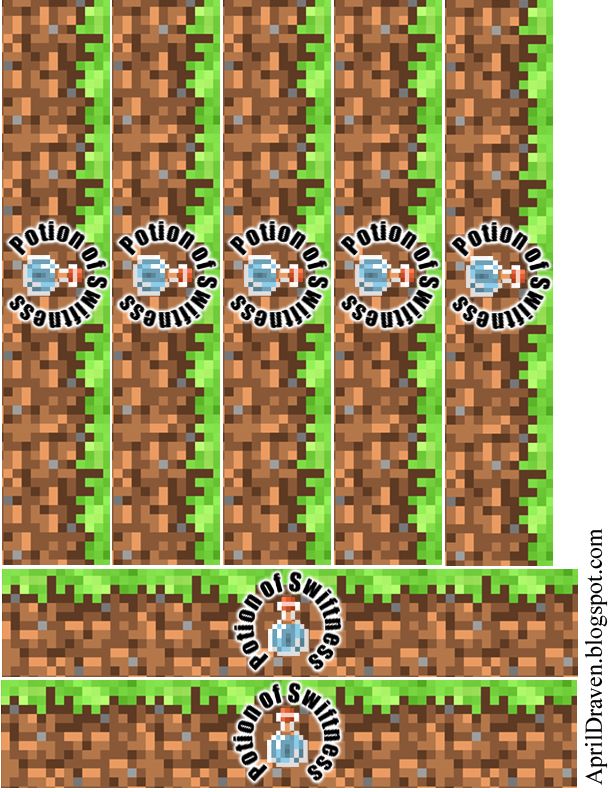
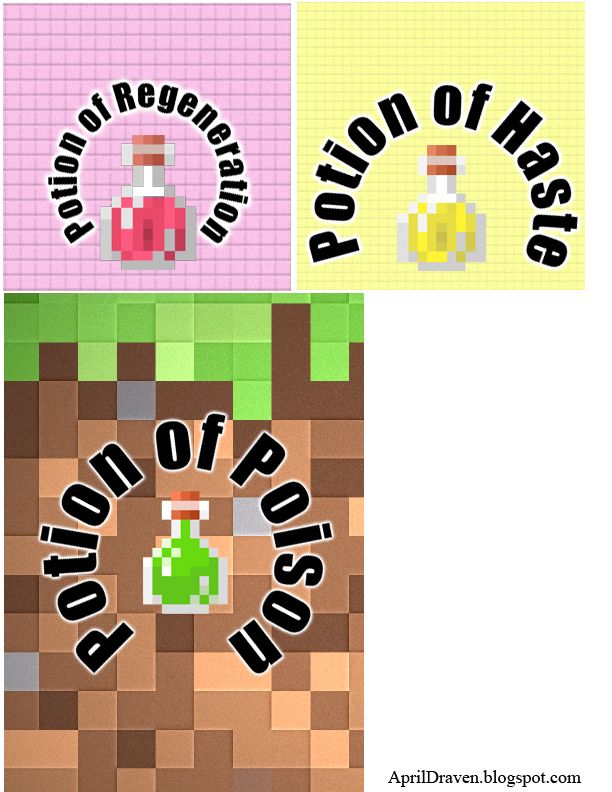
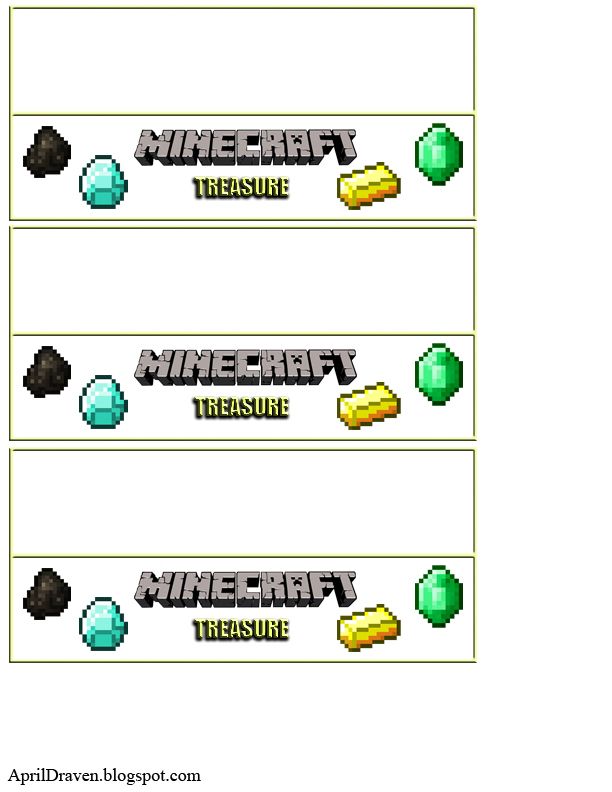
Then, I designed a label to put on a ziplock bag. I filled bags with Jolly ranchers and gold nuggets. I was inspired by this, but I was lazy and decided to throw them all into one bag. I then looked at a bunch of bottle wrapper pictures, and decided to design my own. I filled water bottles with blue and red Koolaid. (Printables at the end)
I found the large paper creeper in the pic here.
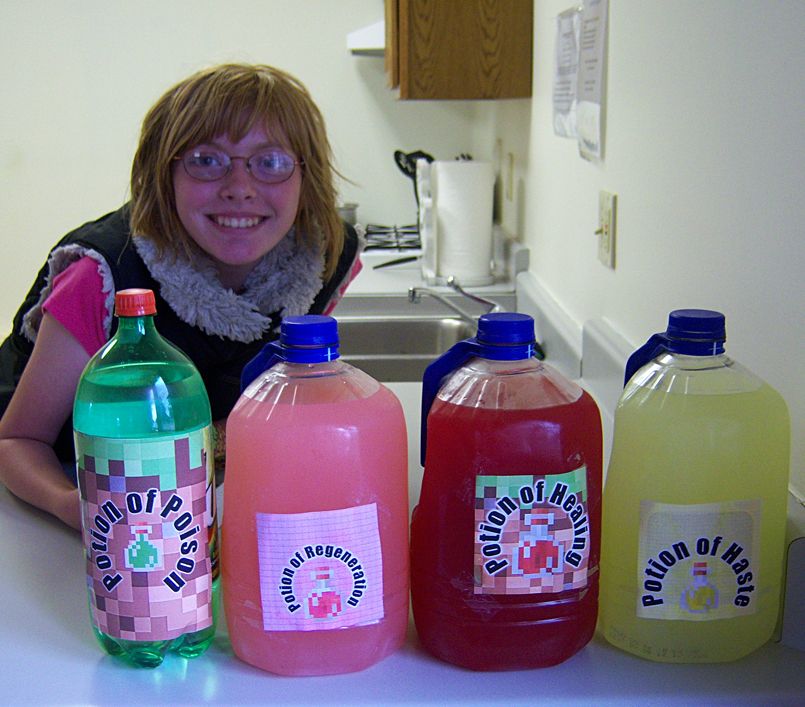
I wanted a little bit more decoration at the party so I designed some labels for 1 gallon Absopure water containers and a 7up container.
Then we just bought green plates, black table covers, green cups and silverware, and black and green balloons at the dollar store. (creeper colors)
Party done. Most of it was printed out. Why spend a bunch of money buying things that you can make? I spent quite a bit of time making these labels for them to only be used for one day, so I wanted to share these. I hope this helps if you are thinking of making a Minecraft party.

Thanks for looking.
For activities I went to this site and printed off a few Minecraft characters. I used the mini ones because they seemed easier to assemble. I let the kids cut them out. I had paste and tape. Almost everyone used tape.
I found this site and printed off the "sticker" pages. I didn't make stickers though. I let the kids paste them to a piece of paper. I gave them crayons and let them draw/color their own minecraft scenes. That took care of the activities.
Next, I had to make party favors. I made some rice krispies treats that looked like minecraft blocks. Chocolate for the bottom and regular colored green for the top.
Then, I designed a label to put on a ziplock bag. I filled bags with Jolly ranchers and gold nuggets. I was inspired by this, but I was lazy and decided to throw them all into one bag. I then looked at a bunch of bottle wrapper pictures, and decided to design my own. I filled water bottles with blue and red Koolaid. (Printables at the end)
I found the large paper creeper in the pic here.
I wanted a little bit more decoration at the party so I designed some labels for 1 gallon Absopure water containers and a 7up container.
Then we just bought green plates, black table covers, green cups and silverware, and black and green balloons at the dollar store. (creeper colors)
Party done. Most of it was printed out. Why spend a bunch of money buying things that you can make? I spent quite a bit of time making these labels for them to only be used for one day, so I wanted to share these. I hope this helps if you are thinking of making a Minecraft party.
Thanks for looking.
Sunday, April 26, 2015
Winter Hat Crochet Pattern
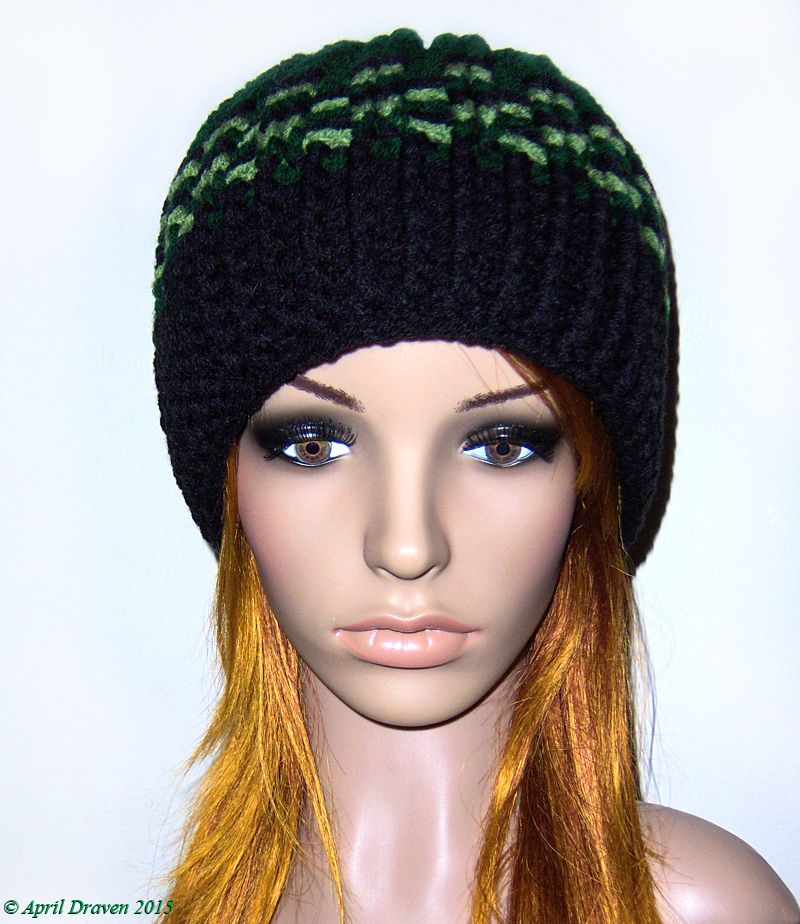
This hat was a Christmas gift for my husband. I wanted to make him something warm, and not so outrageous. *I crochet a lot of fairy hats, not exactly something a guy would want to wear all the time ;)* I had a friend point out that it kinda looks like a Minecraft creeper. That was unintentional, but a welcome bonus. My daughter and husband both play that game, so maybe it was in my subconscious. LOL
If you are interested in the pattern, it is available in my Etsy Shop for $3.00
Thanks for looking :)


Subscribe to:
Posts (Atom)