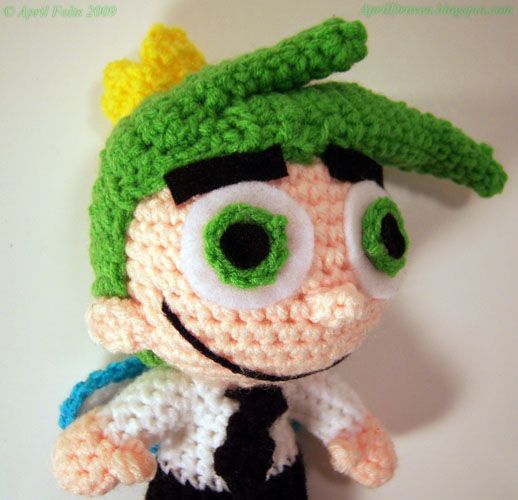
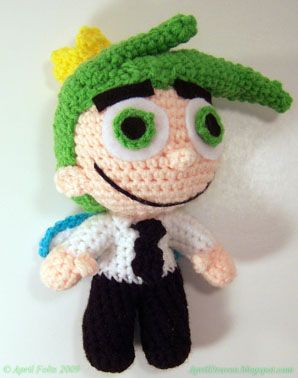
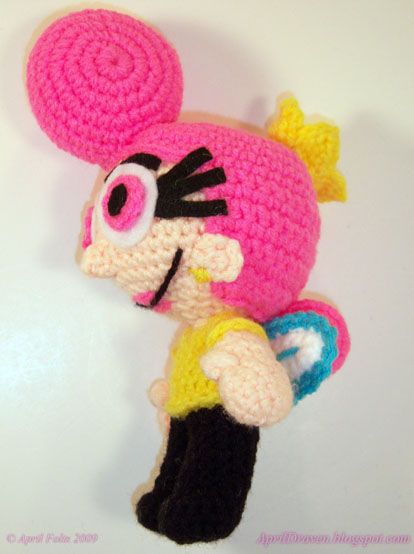
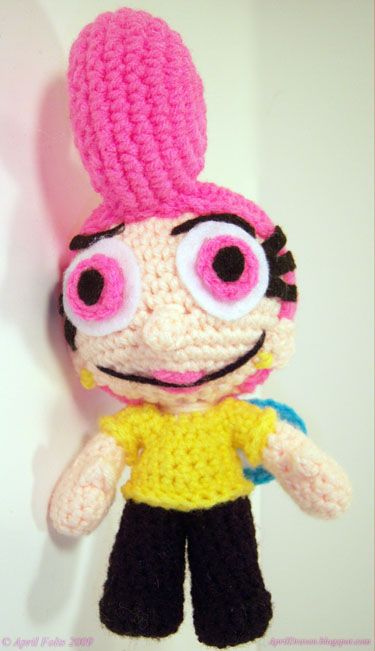
I absolutely adore Fairly Odd Parents or more specifically Cosmo and Wanda :) My Daughter loves the show too so I had to make them. I took my Princess Paige Doll Pattern (I have it for sale in My Store) and made some adjustments. If you can't see the pics right click on the picture and select view picture. What do you think?
For those of you who don't know what they are supposed to look like here is a pic :)
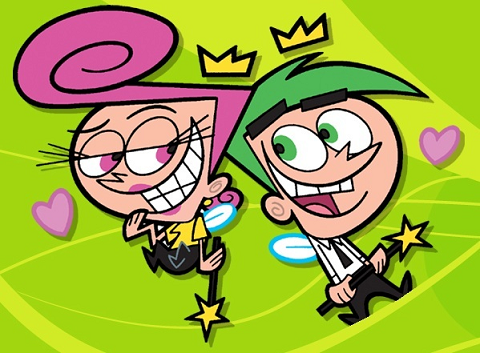
Here are the adjustments. These are meant to go with This Pattern
Cosmo Colors:
Hair: Green
Shirt: White with black tie
Pants Black
Wanda Colors:
Hair: Pink
Shirt: Yellow
Pants: Black
Cosmo
Arms: Switch colors after RND 5
Shirt Collar: after the Arm section, attach white yarn to the front middle and crochet around, do not join, ch 1, turn, sc
back around, FO with a long tail, fold collar down and sew down onto shirt. Then attach head.
Tie:
Rnd 1: ch 3, turn, 2 sc, ch 1, turn
Rnd 2-7: 2 sc, ch 1, turn
Rnd 8: sc2tog 1 time
FO with a long tail
weave tail back up piece and fold the top down a couple rows and sew down. thread tail through collar and attach to the other
side securing the tie.
Hair:
Follow 1st part of Hair on pattern
Pt 2:
Large chunk of Hair:
Work in the round
Rnd 1: 4 sc in ring,
Rnd 2: 4 sc
Rnd 3: 2 sc in each sc around (8)
Rnd 4: 8 sc
Rnd 5: *1 sc, 2 sc in next sc* rep from * to * around (12)
Rnd 6: 12 sc
Rnd 7: *2 sc, 2 sc in next sc* rep from * to * around (16)
Rnd 8: 16 sc
Rnd 9: *3 sc, 2 sc in next sc* rep from * to * around (20)
Rnd 10: 20 sc
Rnd 11: *4 sc, 2 sc in next sc* rep from * to * around (24)
Rnd 12: 24 sc
Rnd 13: *5 sc, 2 sc in next sc* rep from * to * around (28)
No longer worked in round
Row 1-4: 15 sc, ch 1, turn
do not stuff
Small Chunk of Hair:
Work in the round
Rnd 1: 4 sc in ring,
Rnd 2: 4 sc
Rnd 3: 2 sc in each sc around (8)
Rnd 4: 8 sc
Rnd 5: *1 sc, 2 sc in next sc* rep from * to * around (12)
Rnd 6: 12 sc
Rnd 7: *2 sc, 2 sc in next sc* rep from * to * around (16)
Rnd 8: 16 sc
Rnd 9: *3 sc, 2 sc in next sc* rep from * to * around (20)
No longer worked in round
Row 10-13: 15 sc, ch 1, turn
do not stuff
sew to head
Wanda:
Hair:
Follow 1st part of Hair on pattern
Large Swirl:
Rnd 1: Work 8 sc in first ch
Rnd 2: 2 sc in each sc (16)
Rnd 3: *Sc in next sc, 2 sc in next sc*, rep from * to * around (24)
Rnd 4: *Sc in next 2 sc, 2 sc in next sc*, rep from * to * around (32)
Rnd 5-8: Sc in each sc around (4 rounds)
Rnd 9:*2 sc, Sc2tog*, rep from * to * around (24)
Rnd 10: *1 sc, Sc2tog*, rep from * to * around (16)
Rnd 11: sc2tog 11 times
Small Swirl:
Rnd 1: Work 8 sc in first ch
Rnd 2: 2 sc in each sc (16)
Rnd 3&4: sc in each sc around (2 rounds)
Rnd 5: sc2tog 11 times
Ears:
ch 7, sc in 2nd ch from hook, 6 sc, FO and fold in half, sew middle together. For wanda sew earrings on with yellow
Crown:
Rnd 1: Work 8 sc in first ch
Rnd 2: 2 sc in each sc (16)
no longer worked in round
Row 1&2: 4 sc, ch 1, turn
Row 3: sc2tog 2 times
Row 4: sc2tog 1 time
ss down the side and repeat rows 1-4 3 more times
fold edges toward the middle and sew sides together a couple stitches, forming the crown
Wings:
ch 7, turn, sc in 2nd ch from hook (back loop only) 5 sc, sc 3 stitches in the 6th sc spot, turn and sc down the other side,
ch 1 turn, 7 sc, 3 in next space, 6 sc back down the other side, FO, attach blue and sc around entire piece, Stitch blue line in the middle of the wing. attach to doll.
Nose: attach skin color yarn to face and sc 3 stitches across then down 1 and back 2 forming a circle, join with 1 ss, dec around, FO
Face:
Black and White Felt
Glue Gun
If you want to make them have wands you can use a pipe cleaner and some Yellow felt or some yellow foam. Just an idea ;)
If you have any trouble by all means let me know and I will try my best to help :)
*************************************************************************************
Happy New Year Everyone!
**********************************************************************
This work by April Folts is licensed under a Creative Commons Attribution-Noncommercial-No Derivative Works 3.0 United States License.
Wednesday, December 30, 2009
Saturday, December 26, 2009
Princess Paige Doll
This is my newest creation. I had to wait until after Yule to post because I made this for my Daughter. She has red hair and blue eyes so I made the doll to look like her. She loves it. The pattern is available at My Etsy Store if anyone is interested.
Here is her opening it :)
I also made her an Orange Star
Here is her right after she opened it
Here is her opening it :)
I also made her an Orange Star
Here is her right after she opened it
Labels:
Crochet Dolls,
Etsy,
Princess Paige Doll,
Star Stuffie
Friday, December 11, 2009
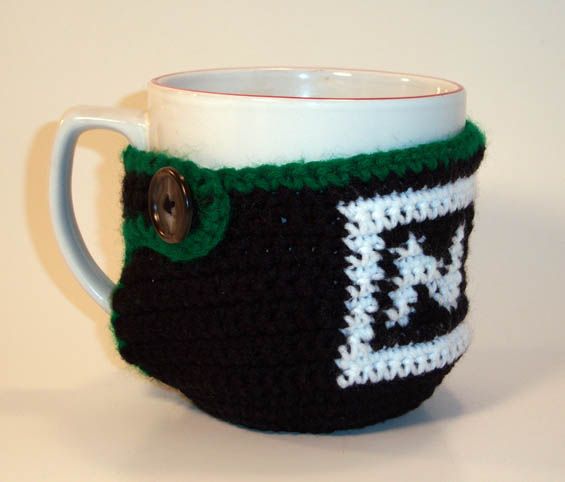
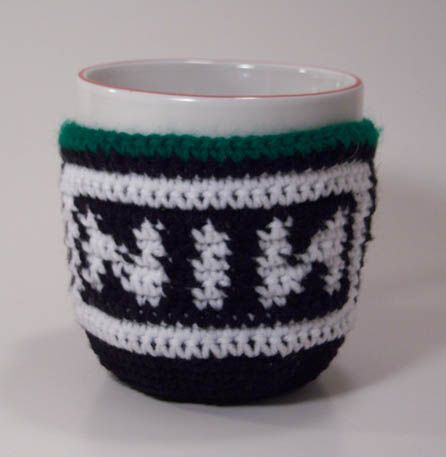
NIN Coffee Cozy
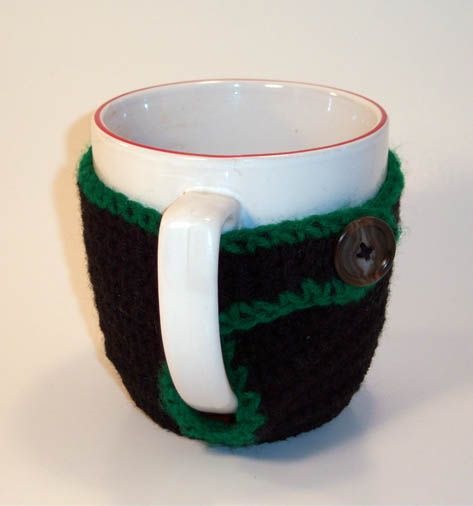
Cup Cozys seem to be the trend right not so I figured "Why not?" Easy Yule Gift hehe. I made this for my husband but gave it to him early. I will probably make him a different one for Yule ;) This is for an over sized cup so it is big. I am going to make a smaller one soon. The hard thing is cups are all different sizes so it is hard to make a universal pattern. I didn't make it with the row going over the top of the handle because I don't like the feel of yarn on my lips when I am drinking coffee LOL
NIN coffee Cozy
By: AprilDraven
for personal use only
Hook Size: 3.25MM
Yarn: regular 4 ply worsted yarn
abbreviation meanings:
sc: single crochet
ss: slip stitch
sk: skip
FO: Fasten Off
With a magic circle ch 1
Rnd 1: Work 8 sc in circle
Rnd 2: 2 sc in each sc (16)
Rnd 3: *Sc in next sc, 2 sc in next sc*, rep from * to * around (24)
Rnd 4: *Sc in next 2 sc, 2 sc in next sc*, rep from * to * around (32)
Rnd 5: *Sc in next 3 sc, 2 sc in next sc*, rep from * to * around (40)
*If you have a smaller cup stop after this rnd and go to rnd 8, You want it to be a tight fit so it doesn't slide off when you pick up the cup*
Rnd 6: *Sc in next 4 sc, 2 sc in next sc*, rep from * to * around (48)
Rnd 7: *Sc in next 5 sc, 2 sc in next sc*, rep from * to * around (56)
Rnd 8-10: Sc in each sc around (3 rounds)
at the end of the last round ss 1, ch 1, turn
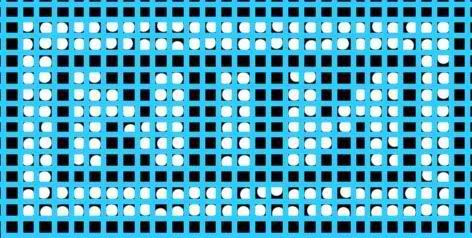
Row 1: 15 sc, start white on pattern, when you get to the end of this row, ch 1 and turn.
*NOTE: If you want to put something else on it instead take the number of stitches wide it is and subtract that from the total amount you have. Then divide that number by 2. sc that number then start the pattern. That should center your image.*
Row 2-14: sc in each sc continuing pattern. At the end of each row ch 1, turn.
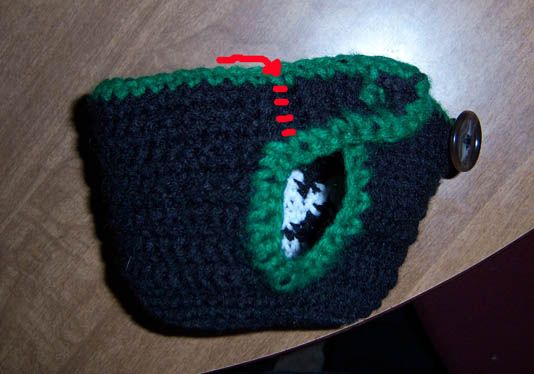
strap:
sc 4 down side, ch 1 turn (repeat 3 more times)
1 sc, ch 2, sk 2, 1 sc, ch 1 turn (this forms hole for button)
dec 2, ch 1, turn
dec 1, Fo
attach trim color and sc around border all the way around, *when you get to the tip of the strap put 3 stitches in the tip*
sew button on where it will be really tight. You don't want it to slide off when you pick it up to take a drink ;)
**********************************************************************
This work by April Folts is licensed under a Creative Commons Attribution-Noncommercial-No Derivative Works 3.0 United States License.
***********************************************************************
Any donations are welcome and appreciated.
NIN coffee Cozy
By: AprilDraven
for personal use only
Hook Size: 3.25MM
Yarn: regular 4 ply worsted yarn
abbreviation meanings:
sc: single crochet
ss: slip stitch
sk: skip
FO: Fasten Off
With a magic circle ch 1
Rnd 1: Work 8 sc in circle
Rnd 2: 2 sc in each sc (16)
Rnd 3: *Sc in next sc, 2 sc in next sc*, rep from * to * around (24)
Rnd 4: *Sc in next 2 sc, 2 sc in next sc*, rep from * to * around (32)
Rnd 5: *Sc in next 3 sc, 2 sc in next sc*, rep from * to * around (40)
*If you have a smaller cup stop after this rnd and go to rnd 8, You want it to be a tight fit so it doesn't slide off when you pick up the cup*
Rnd 6: *Sc in next 4 sc, 2 sc in next sc*, rep from * to * around (48)
Rnd 7: *Sc in next 5 sc, 2 sc in next sc*, rep from * to * around (56)
Rnd 8-10: Sc in each sc around (3 rounds)
at the end of the last round ss 1, ch 1, turn
Row 1: 15 sc, start white on pattern, when you get to the end of this row, ch 1 and turn.
*NOTE: If you want to put something else on it instead take the number of stitches wide it is and subtract that from the total amount you have. Then divide that number by 2. sc that number then start the pattern. That should center your image.*
Row 2-14: sc in each sc continuing pattern. At the end of each row ch 1, turn.
strap:
sc 4 down side, ch 1 turn (repeat 3 more times)
1 sc, ch 2, sk 2, 1 sc, ch 1 turn (this forms hole for button)
dec 2, ch 1, turn
dec 1, Fo
attach trim color and sc around border all the way around, *when you get to the tip of the strap put 3 stitches in the tip*
sew button on where it will be really tight. You don't want it to slide off when you pick it up to take a drink ;)
**********************************************************************
This work by April Folts is licensed under a Creative Commons Attribution-Noncommercial-No Derivative Works 3.0 United States License.
***********************************************************************
Any donations are welcome and appreciated.
Sunday, December 6, 2009
Child's Invincibility Star Convertible Hat *Free Crochet Pattern*
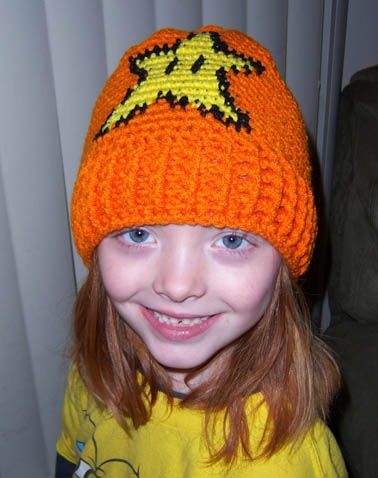
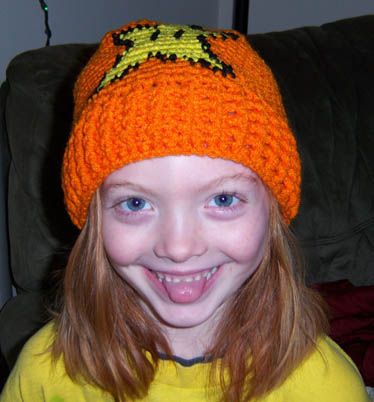
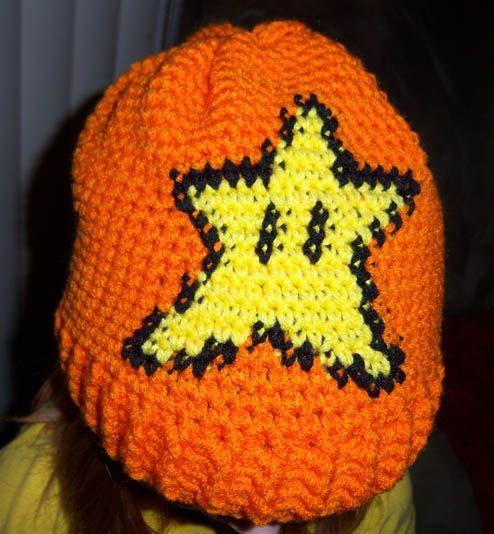
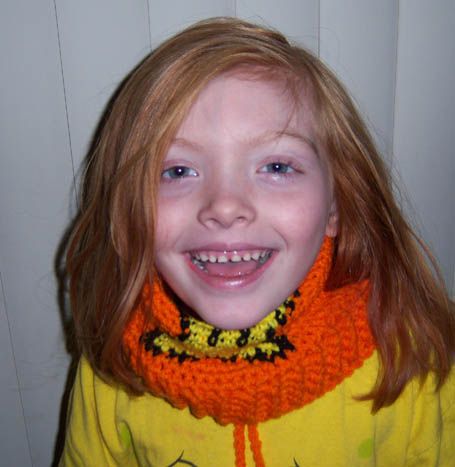
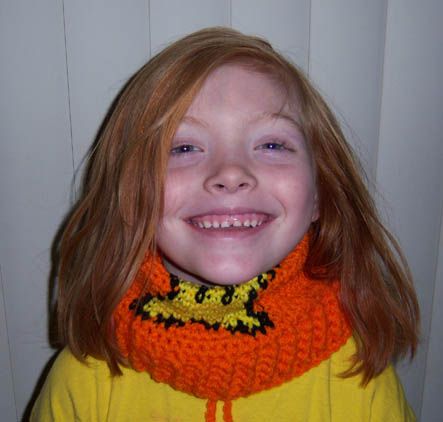
My daughter stretched out her Link Hat that I made her and now it falls off her head so I had to make her a hat that was more snug. I decided to make her this. She loves Mario and Twinkle Stars so this was perfect for her :) I would have used my model head but the hat wouldn't fit her lol. It's all good my daughter loves the camera. If I could only get her to stay still though haha. Everyone says she looks like Dakota Fanning. I can see that :) Ok on to the hat. I know I said no more projects until Yule but she needed it ;) If you can't see the pictures right click on them and select view picture :)
Ok on to the pattern...
Child's Invincibility Star Convertible Hat
By: AprilDraven
for personal use only
Yarn: regular 4 ply worsted yarn
abbreviation meanings:
sc: single crochet
dc: double crochet
fp: Front post
bp: back post
ss: slip stitch
sk: skip
FO: Fasten Off
H/8-5.00MM hook
100% Acrylic yarn (the cheap stuff LOL)
with main color ch 60 join to first ch with a ss to form a circle (or chain enough to go around your head or the Child's), ch 1
Rnd 1: sc in each ch around, join with a ss to top of first sc, ch 2
Rnd 2-6: *1dcfp, 1dcbp* repeat from * to * around, join with a ss to top of first dc, ch 2 (5 rounds) (on the end of the 5th round ch 1 instead of chaining 2)
Rnd 7: sc in each dc around, insert marker because from now on you will be working in the round
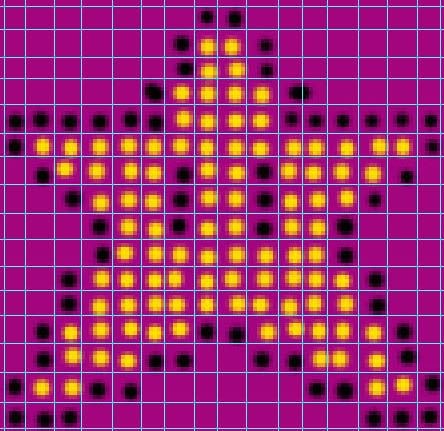
Rnd 8: 22 sc, Start the star pattern. I figured out the 22 by taking the amount of stitches the star was across and subtracting that number from how many stitches I had and then divided that number by 2. That will put the star on the front of the hat. So if you are making an adult hat or are putting another charted thing on it (I have a Mario mushroom and a NIN chart that would work too)that is how to do it.
Rnd 9-32: sc in each sc around (23 rounds if making an adult hat keep going until it reaches about 10 inches, You might have to keep going even more than that if you have a bigger head)
Last Round: join with 1 ss, ch 2, sk 1, 2 sc *ch 1, sk 1, 2 sc* rep from * to * around, Join with 1 ss, FO
for the top tie ch 140 FO and weave around the top holes and cinch shut and tie a bow. add beads to the end ties and you are done :D
You can wear the hat as a slouchy hat, Pull your hair through the hole in the top, fold up the brim, or wear it as a scarf.
**********************************************************************
This work by April Folts is licensed under a Creative Commons Attribution-Noncommercial-No Derivative Works 3.0 United States License.
***********************************************************************
Ok on to the pattern...
Child's Invincibility Star Convertible Hat
By: AprilDraven
for personal use only
Yarn: regular 4 ply worsted yarn
abbreviation meanings:
sc: single crochet
dc: double crochet
fp: Front post
bp: back post
ss: slip stitch
sk: skip
FO: Fasten Off
H/8-5.00MM hook
100% Acrylic yarn (the cheap stuff LOL)
with main color ch 60 join to first ch with a ss to form a circle (or chain enough to go around your head or the Child's), ch 1
Rnd 1: sc in each ch around, join with a ss to top of first sc, ch 2
Rnd 2-6: *1dcfp, 1dcbp* repeat from * to * around, join with a ss to top of first dc, ch 2 (5 rounds) (on the end of the 5th round ch 1 instead of chaining 2)
Rnd 7: sc in each dc around, insert marker because from now on you will be working in the round
Rnd 8: 22 sc, Start the star pattern. I figured out the 22 by taking the amount of stitches the star was across and subtracting that number from how many stitches I had and then divided that number by 2. That will put the star on the front of the hat. So if you are making an adult hat or are putting another charted thing on it (I have a Mario mushroom and a NIN chart that would work too)that is how to do it.
Rnd 9-32: sc in each sc around (23 rounds if making an adult hat keep going until it reaches about 10 inches, You might have to keep going even more than that if you have a bigger head)
Last Round: join with 1 ss, ch 2, sk 1, 2 sc *ch 1, sk 1, 2 sc* rep from * to * around, Join with 1 ss, FO
for the top tie ch 140 FO and weave around the top holes and cinch shut and tie a bow. add beads to the end ties and you are done :D
You can wear the hat as a slouchy hat, Pull your hair through the hole in the top, fold up the brim, or wear it as a scarf.
**********************************************************************
This work by April Folts is licensed under a Creative Commons Attribution-Noncommercial-No Derivative Works 3.0 United States License.
***********************************************************************
Labels:
Child's Invincibility Star Hat,
Free Pattern,
Hat
Wednesday, December 2, 2009
Super Star Slouchy Hat
I made the star stuffie for my daughter and I was staring at it thinking I should make a slouchy hat with a BIG star on it. (lol I have a slouchy hat obsession at the moment) So I did. I used the same colors as the other one because I just love earthy tones :)I think I might use simply soft yarn next time just because it is more flexible. After this post I am going to have to stop for a while. I have a ton of Yule gifts to make and I don't want certain people finding out what their gifts are ;) I will post all the goodness after the holidays though :D
I have the pattern available for $3.00 in My Etsy Shop if anyone is interested.
Monday, November 30, 2009
Star Stuffie "Twinkle Star" Free Crochet Pattern
My Husband has been telling my daughter bedtime stories with a Twinkle Star and Rainbow Pony. So my daughter has been bugging me to make Twinkle Star. I decided to quit putting it off and make it. I have just been sooooooo busy lately. I plan on making her an Orange one for Yule. (her favorite color is Orange) Well here it is in all the Twinkle glory. I might put a face on it later if she wants one. I was thinking of the Mario Star the whole time haha I wonder if she would let me put eyes on it...Anyways, I might not be posting as frequently because I have to make a ton of stuff for Yule and can't post it until after the recipients have received their gifts but there will be a ton of stuff posted after the holidays.
Star Stuffie "Twinkle Star"
By: AprilDraven
for personal use only
3.25mm hook
Yarn: 100% acrylic worsted 4 ply
Height: about 8 inches tall
Abbreviations:
Ch: chain
Rnd: round
Sc: single crochet
Ss: slip stitch
FO: Fasten off
work in the round until specified different
ch 1 or use magic circle
Rnd 1: Work 10 sc in circle
Rnd 2: 2 sc in each sc around (20)
Rnd 3: *sc 3, 2 sc in next sc* rep from * to * around (25)
Rnd 4: *sc 4, 2 sc in next sc* rep from * to * around (30)
Rnd 5: *sc 5, 2 sc in next sc* rep from * to * around (35)
Rnd 6: *sc 6, 2 sc in next sc* rep from * to * around (40)
Rnd 7: *sc 7, 2 sc in next sc* rep from * to * around (45)
Rnd 8: *sc 8, 2 sc in next sc* rep from * to * around (50)
no longer work in the round
Row 1: 10 sc, ch 1, turn
Row 2: sc in each sc across, ch 1, turn
Row 3: sc2tog, 6 sc, sc2tog, ch 1, turn
Row 4: sc in each sc across, ch 1, turn
Row 5: sc2tog, 4 sc, sc2tog, ch 1, turn
Row 6: sc in each sc across, ch 1, turn
Row 7: sc2tog, 2 sc, sc2tog, ch 1, turn
Row 8: sc in each sc across, ch 1, turn
Row 9: sc2tog 2 times, ch 1, turn
Row 10: sc2tog
Row 11: ss down the side
*the ss down the side in is Red* *the Green is where you start the next section*
(Repeat rows 1-11, 4 more times)
If you want smoother seams you can sc around the entire star when you are done.
When Star is complete make another one and whip stitch the two pieces together. Stop when you have a hole that is a couple inches. Stuff and then sew up the hole.
**********************************************************************
This work by April Folts is licensed under a Creative Commons Attribution-Noncommercial-No Derivative Works 3.0 United States License.
***********************************************************************
Any donations are welcome and appreciated.
Star Stuffie "Twinkle Star"
By: AprilDraven
for personal use only
3.25mm hook
Yarn: 100% acrylic worsted 4 ply
Height: about 8 inches tall
Abbreviations:
Ch: chain
Rnd: round
Sc: single crochet
Ss: slip stitch
FO: Fasten off
work in the round until specified different
ch 1 or use magic circle
Rnd 1: Work 10 sc in circle
Rnd 2: 2 sc in each sc around (20)
Rnd 3: *sc 3, 2 sc in next sc* rep from * to * around (25)
Rnd 4: *sc 4, 2 sc in next sc* rep from * to * around (30)
Rnd 5: *sc 5, 2 sc in next sc* rep from * to * around (35)
Rnd 6: *sc 6, 2 sc in next sc* rep from * to * around (40)
Rnd 7: *sc 7, 2 sc in next sc* rep from * to * around (45)
Rnd 8: *sc 8, 2 sc in next sc* rep from * to * around (50)
no longer work in the round
Row 1: 10 sc, ch 1, turn
Row 2: sc in each sc across, ch 1, turn
Row 3: sc2tog, 6 sc, sc2tog, ch 1, turn
Row 4: sc in each sc across, ch 1, turn
Row 5: sc2tog, 4 sc, sc2tog, ch 1, turn
Row 6: sc in each sc across, ch 1, turn
Row 7: sc2tog, 2 sc, sc2tog, ch 1, turn
Row 8: sc in each sc across, ch 1, turn
Row 9: sc2tog 2 times, ch 1, turn
Row 10: sc2tog
Row 11: ss down the side
*the ss down the side in is Red* *the Green is where you start the next section*
(Repeat rows 1-11, 4 more times)
If you want smoother seams you can sc around the entire star when you are done.
When Star is complete make another one and whip stitch the two pieces together. Stop when you have a hole that is a couple inches. Stuff and then sew up the hole.
**********************************************************************
This work by April Folts is licensed under a Creative Commons Attribution-Noncommercial-No Derivative Works 3.0 United States License.
***********************************************************************
Any donations are welcome and appreciated.
Friday, November 27, 2009
More Resin Jewelry
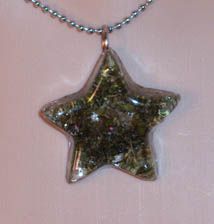
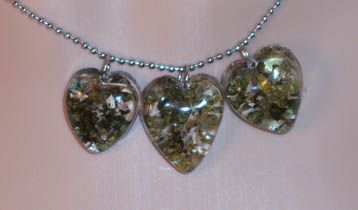
I love making necklaces :) Too bad it takes about 3 to 4 days to completely make.
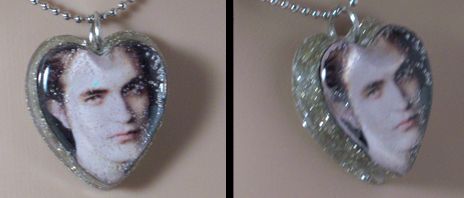
and another Edward one. It still isn't perfect but I will keep trying until I get a perfect one hehe
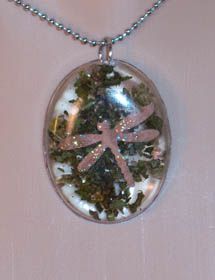
Some more Herb Charms :)
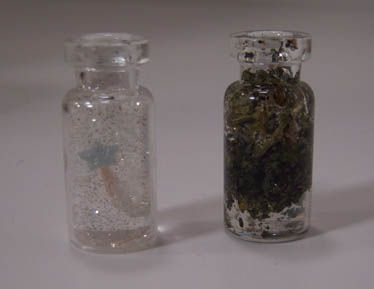
My friend Mandi gave me a bunch of tiny jars. This is what I have come up with so far.
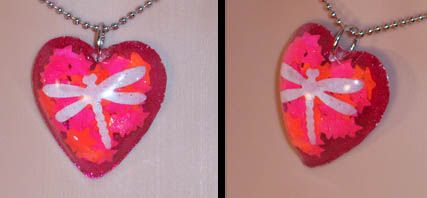
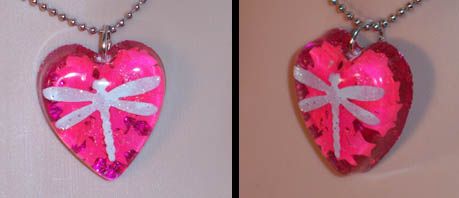
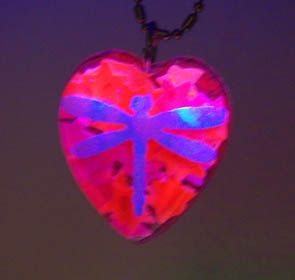
Here is the coolest part. All the necklaces with the pink and orange stars are black light reactive and the dragonfly's glow in the dark.
Subscribe to:
Posts (Atom)