Friday, January 22, 2010

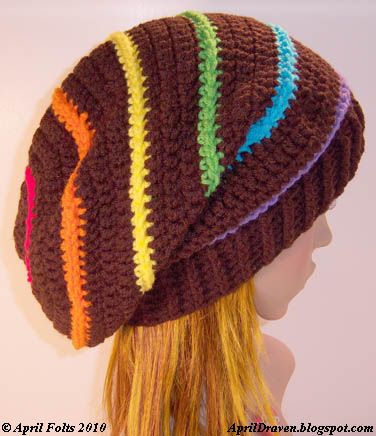
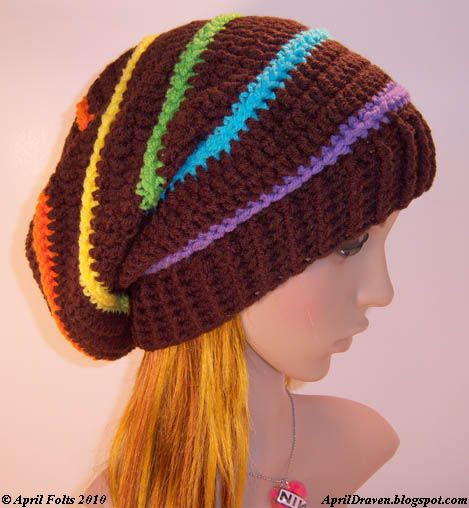
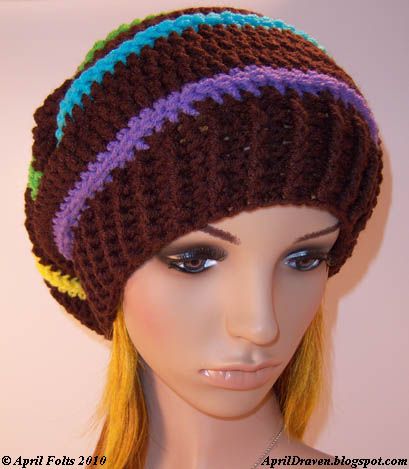
Candy Rainbow Slouch Hat

My daughter loves rainbows and keeps trying to get me to wear her rainbow hat in public. I like rainbows too but I also don't like tons of eyes on me. This hat is subtle enough for me to wear out LOL. I also thought ridges would be cool on a hat. Adds texture to the colored stripes. I named it Candy Rainbow because for some reason it reminds me of skittles haha. Maybe I just have candy on the mind with valentine's day coming up. What do you think? After this hat I am taking a month long break. I have so much stuff on hold to do. :)

I have the pattern available for $3.00 in My Etsy Shop if anyone is interested.


Tuesday, January 12, 2010

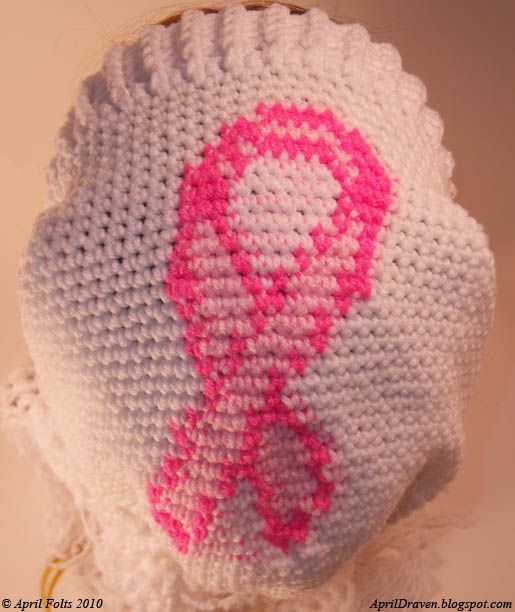
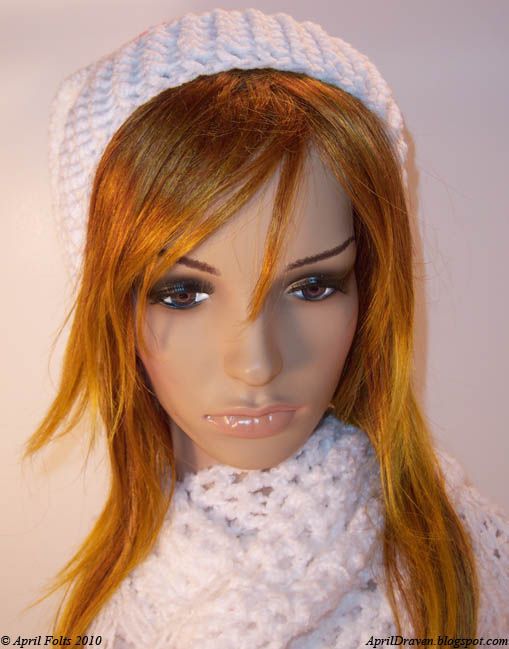
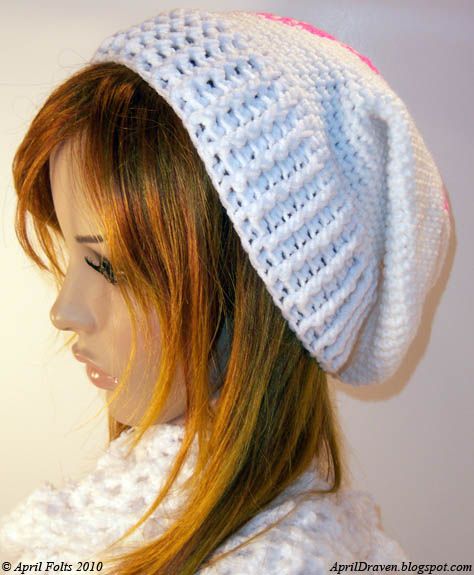
Breast Cancer Awareness Slouch Hat

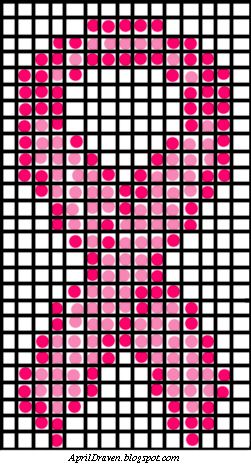
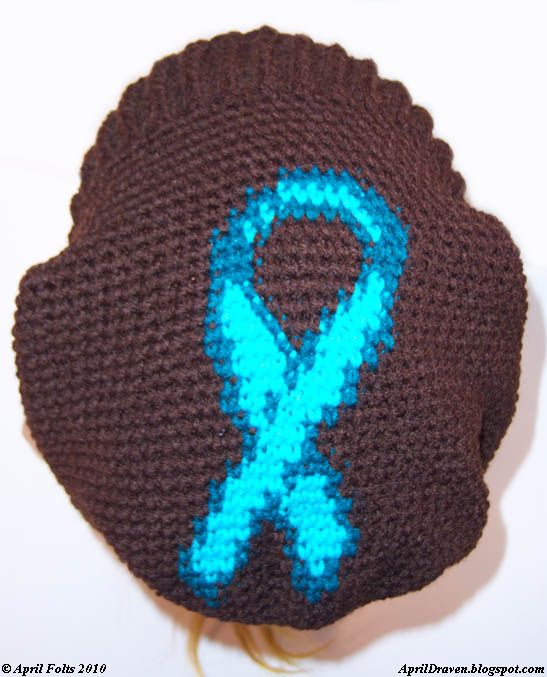
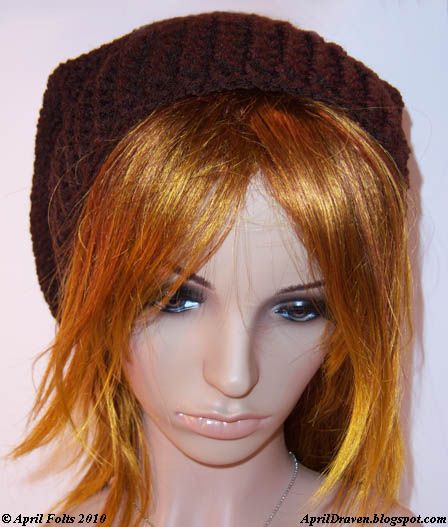
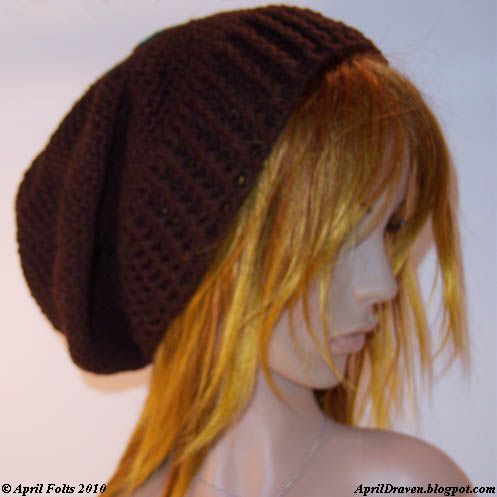
One of my friends on Facebook was making a Breast Cancer Awareness scarf so that sparked the idea to make a hat. Making the chart was a little difficult but I got it down :) It was a bit big to put on a beanie hat so I just made it into a slouch hat. I am not a huge fan of Pink so I made the hat white instead. The cool thing about the ribbon is you can make it any color so you can make a hat for any cause that has a ribbon.What do you think?

Here is a link on How To Read A Chart And Switch Colors


Breast Cancer Awareness Slouch Hat
by: AprilDraven

For personal use only or for fund raising. If you use it for fund raising please tell me how it went. I would love to hear about it :)

Gauge: 4 inches = 13 stitches and 14 rows
My head size is 22 and a half inches around so adjust your hook size accordingly. Remember yarn stretches a little bit so this hat will fit inches bigger too.

Yarn: regular 4 ply worsted yarn

H hook

Abbreviations:
Rnd: round
Sc: single crochet
dc: double crochet
hdc: half double crochet
fpdc: front post double crochet
bpdc: back post double crochet
Ss: slip stitch
FO: Fasten off

*NOTE: use a marker and work in rounds*

With main color ch 1 or form magic circle
Rnd 1: 8 sc in ring
Rnd 2: 2 sc in each sc around (16)
Rnd 3: *1 sc, 2 sc in next sc* rep from * to * around (24)
Rnd 4: *2 sc, 2 sc in next sc* rep from * to * around (32)
Rnd 5: *3 sc, 2 sc in next sc* rep from * to * around (40)
Rnd 6: *4 sc, 2 sc in next sc* rep from * to * around (48)
Rnd 7: sc in each sc around
Rnd 8: *5 sc, 2 sc in next sc* rep from * to * around (56)
Rnd 9: sc in each sc around
Rnd 10: *6 sc, 2 sc in next sc* rep from * to * around (64)
Rnd 11: sc in each sc around
Rnd 12: *7 sc, 2 sc in next sc* rep from * to * around (72) (Try hat on at this point. If it is tight do another round *8 sc, 2 sc in next sc* if it still isn't big enough try *9 sc, 2 sc in next sc*)
On Rnd 13 (or next round if you kept going on the last section): 25 sc then start the chart


Rnd 13-42: sc in each sc around (29 rnds)
Rnd 43: 1 hdc in each sc around
Rnd 44-49: *1 fpdc, 1 bpdc* rep from * to * around
FO
***********************************************************


Ovarian Cancer Awareness Slouch Hat
by: AprilDraven

For personal use only or for fund raising. If you use it for fund raising please tell me how it went. I would love to hear about it :)

Gauge: 4 inches = 13 stitches and 14 rows
My head size is 22 and a half inches around so adjust your hook size accordingly. Remember yarn stretches a little bit so this hat will fit inches bigger too.

Yarn: regular 4 ply worsted yarn

H hook

Abbreviations:
Rnd: round
Sc: single crochet
dc: double crochet
hdc: half double crochet
fpdc: front post double crochet
bpdc: back post double crochet
Ss: slip stitch
FO: Fasten off

*NOTE: use a marker and work in rounds*

With main color ch 1 or form magic circle
Rnd 1: 8 sc in ring

Rnd 2: 2 sc in each sc around (16)

Rnd 3: *1 sc, 2 sc in next sc* rep from * to * around (24)
Rnd 4: *2 sc, 2 sc in next sc* rep from * to * around (32)
Rnd 5: *3 sc, 2 sc in next sc* rep from * to * around (40)
Rnd 6: *4 sc, 2 sc in next sc* rep from * to * around (48)

Rnd 7: *5 sc, 2 sc in next sc* rep from * to * around (56)

Rnd 8: *6 sc, 2 sc in next sc* rep from * to * around (64)

Rnd 9: *7 sc, 2 sc in next sc* rep from * to * around
(72)
Rnd 10: *8 sc, 2 sc in next sc* rep from * to * around
(80)
On Rnd 11: 25 sc then start the chart


Rnd 11-46: sc in each sc around (35 rnds)
Rnd 47: 1 hdc in each sc around
Rnd 48-53: *1 fpdc, 1 bpdc* rep from * to * around
FO

Saturday, January 9, 2010

Valentine's Day Project 2010

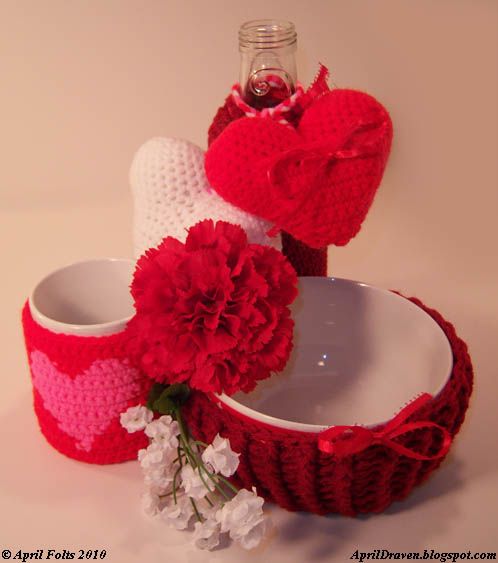
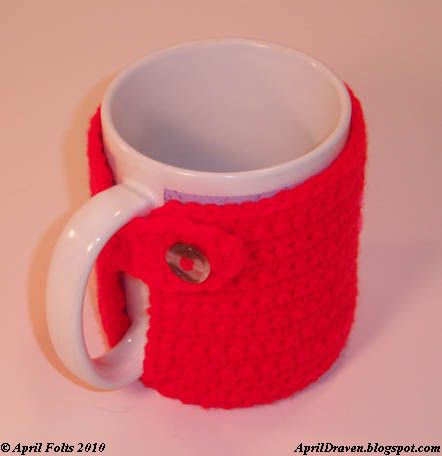
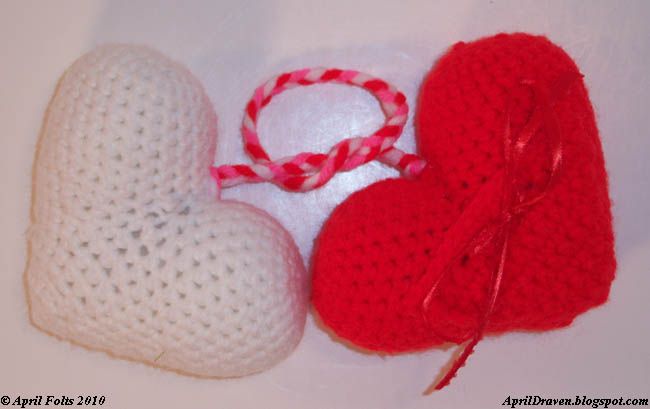
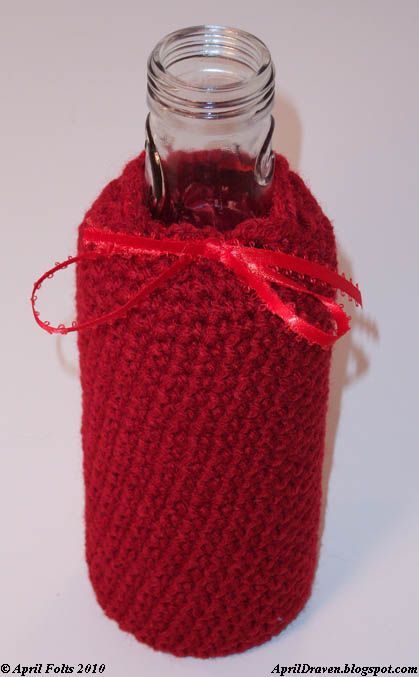
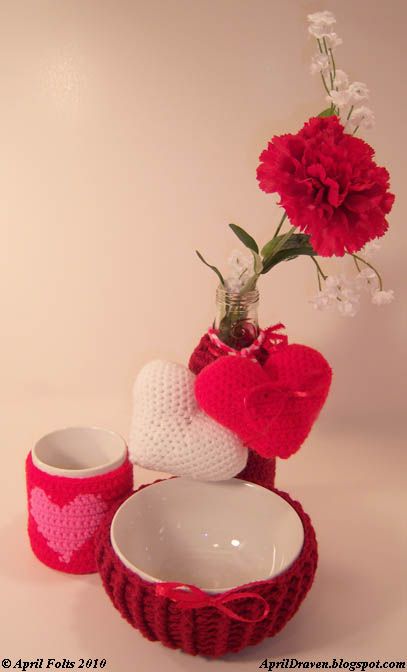
I know this might sound weird but it all started when I was heating a bowl of Oatmeal and burnt my hands on the bowl. I figured that I should make a bowl cozy so that wouldn't happen again lol. After I made it I thought about what other purposes it could have. It can be a bowl on it's own, You can cinch it up and give it as a gift, use it to decorate a bowl, use it as a bowl cover for a floating candle, and much more. Valentine's day is coming up so I wanted to make something cheap and have it look cool. I got a so-be bottle and crocheted around it for a vase. Then I decided to add stuffed hearts. I wanted to personalize it more so I gave one of the hearts a pocket (the red one) so I can add a note to it. I braided a cord and attached it to the hearts then onto the bottle. Then I crocheted a heart coffee cozy. I figured we could have coffee and soup for Valentine's day instead of chocolate. (hey I have to try to stay on a diet and this is a perfect alternative) What do you think?
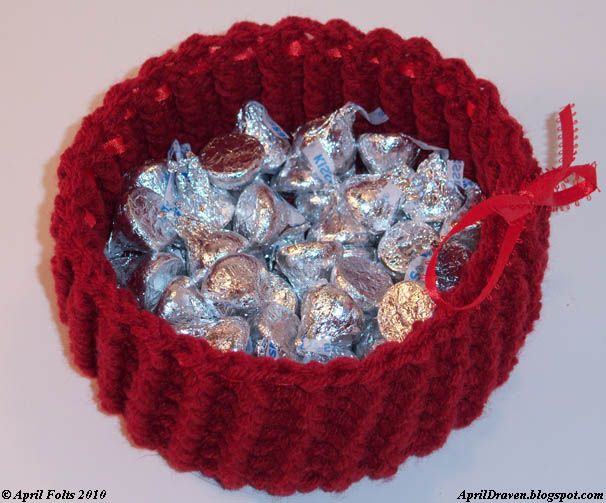
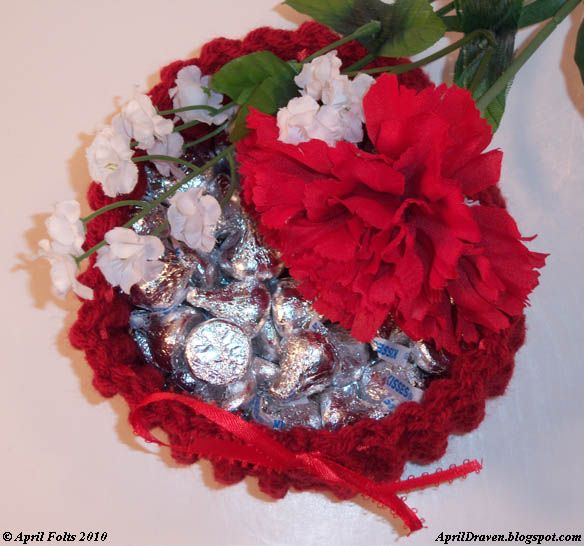
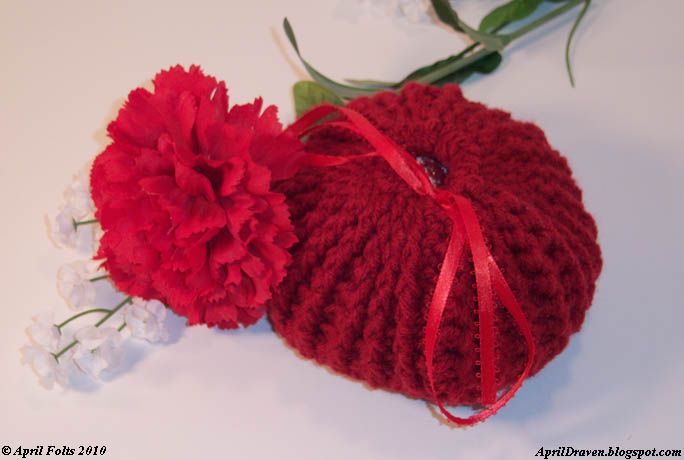
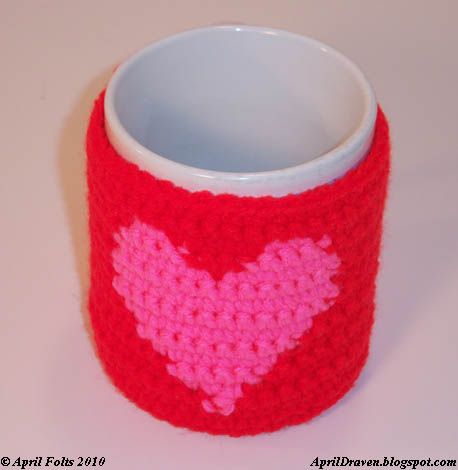


Hooks: H hook and 3.25 mm hook for the hearts

Yarn: 100% acrylic, Worsted Weight, 4 ply yarn

Abbreviations:
Ch: chain
Rnd: round
sc: single crochet
dc: double crochet
Fpdc: Front post double crochet
Bpdc: Back Post double crochet
Ss: slip stitch
FO: Fasten off


Bowl Cozy
Work in the round using a marker
Rnd 1: Work 8 sc in a ring
Rnd 2: 2 sc in each sc (16)
Rnd 3: *Sc in next sc, 2 sc in next sc*, rep from * to * around (24)
Rnd 4: *Sc in next 2 sc, 2 sc in next sc*, rep from * to * around (32)
Rnd 5: *Sc in next 3 sc, 2 sc in next sc*, rep from * to * around (40)
Rnd 6: 1 Sc in each sc around (1 round)
Rnd 7: *Sc in next 4 sc, 2 sc in next sc*, rep from * to * around (48)
Rnd 8: 1 Sc in each sc around (1 round)
Rnd 9: *Sc in next 5 sc, 2 sc in next sc*, rep from * to * around (56)
join with 1 ss
No longer worked in the round
Rnd 10: ch 1, 1 hdc in each sc around, join with 1 ss
Rnd 11-17: ch 2, *1 fpdc, 1 bpdc* rep from * to * around (7 rounds)
weave a ribbon around the top if desired :)


Bottle Cozy:
Work in the round using a marker
Rnd 1: Work 8 sc in first ch
Rnd 2: 2 sc in each sc (16)
Rnd 3: *Sc in next sc, 2 sc in next sc*, rep from * to * around (24)
Rnd 4: *Sc in next 2 sc, 2 sc in next sc*, rep from * to * around (32)
Rnd 5-33: 1 sc in each sc around, Join with 1 ss (28 rounds)
Rnd 34: ch 3, sk 2, 2 sc *ch 2, sk 2, 2 sc* rep from * to * around, join 1 ss
FO and Weave ribbon or something around to cinch it up.


Hearts
Use 3.25 mm Hook:
hump (make 2)
Work in the round using a marker
Rnd 1: Work 8 sc a ring
Rnd 2: 2 sc in each sc (16)
Rnd 3: *Sc in next sc, 2 sc in next sc*, rep from * to * around (24)
Rnd 4-9: 1 sc in each sc around, ss 1, FO
sew middles together 5 stitches
Rnd 1: sc around entire piece (42 stitches)
Rnd 2: *Sc in next 4 sc, Sc2tog*, rep from * to * around (35)
Rnd 3: 1 sc in each sc around (1 round)
Rnd 4: *Sc in next 3 sc, Sc2tog*, rep from * to * around (28)
Rnd 5: 1 sc in each sc around (1 round)
Rnd 6: *Sc in next 2 sc, Sc2tog*, rep from * to * around (21)
Rnd 7: 1 sc in each sc around (1 round)
Stuff
Rnd 8: *1 Sc in next sc, Sc2tog*, rep from * to * around (14)
Rnd 9: 1 sc in each sc around (1 round)
Rnd 10: sc2tog 11 times, ss 1, FO
pocket
Not worked in the round
Row 1: 2 sc in ring, ch 1 turn (2)
Row 2: 2 sc in each stitch, ch 1, turn (4)
Row 3: sc in each sc, ch 1, turn (4)
Row 4: 2 sc in next stitch, 2 sc, 2 sc in next stitch, ch 1, turn (6)
Row 5: 1 sc in each sc, ch 1, turn (1 row)
Row 6: 2 sc in next stitch, 4 sc, 2 sc in next stitch, ch 1, turn ( 8 )
Row 7: 1 sc in each sc, ch 1, turn (1 row)
Row 8: 2 sc in next stitch, 6 sc, 2 sc in next stitch, ch 1, turn (10)
Row 9: 1 sc in each sc, ch 1, turn (1 row)
Row 10: 2 sc in next stitch, 8 sc, 2 sc in next stitch, ch 1, turn (12)
Row 11: 1 sc in each sc, ch 1, turn (1 row)
Row 12: 2 sc in next stitch, 10 sc, 2 sc in next stitch, ch 1, turn (14)
Row 13: 1 sc in each sc, ch 1, turn (1 row)
FO and sew on to heart, put whatever you want into the pocket and then weave a ribbon through the heart and pocket to keep it shut.


Heart Coffee Cozy:
USE 3.25 MM Hook


Rnd 1: Work 8 sc in circle
Rnd 2: 2 sc in each sc (16)
Rnd 3: *Sc in next sc, 2 sc in next sc*, rep from * to * around (24)
Rnd 4: *Sc in next 2 sc, 2 sc in next sc*, rep from * to * around (32)
Rnd 5: *Sc in next 3 sc, 2 sc in next sc*, rep from * to * around (40)
Rnd 6-9: Sc in each sc around (4 rounds) at the end of the last round ss 1, ch 1, turn
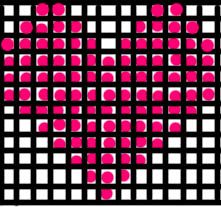
Row 1: 20 sc, start pink on pattern, when you get to the end of this row, ch 1 and turn.

Row 2-14: sc in each sc continuing pattern. At the end of each row ch 1, turn.

Strap:
sc 4 down side, ch 1 turn (repeat 3 more times)
1 sc, ch 2, sk 2, 1 sc, ch 1 turn (this forms hole for button)
sc2tog 2 times, ch 1, turn
sc2tog 1 time, Fo
Attach trim color and sc around border all the way around, *when you get to the tip of the strap put 3 stitches in the tip*
Sew button on where it will be really tight. You don't want it to slide off when you pick it up to take a drink ;)
Wednesday, January 6, 2010

Winter Slouch Hat

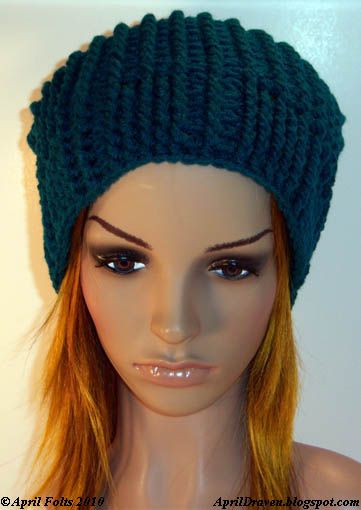
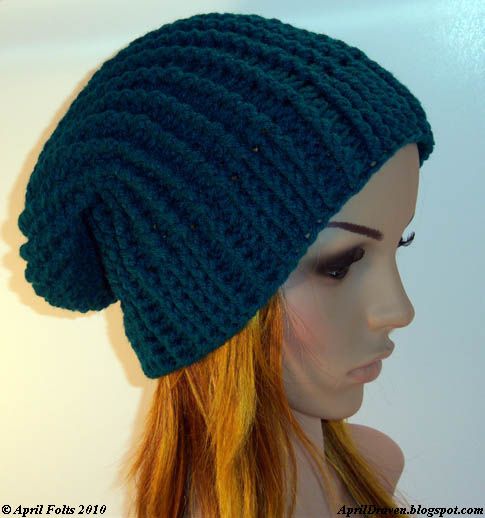
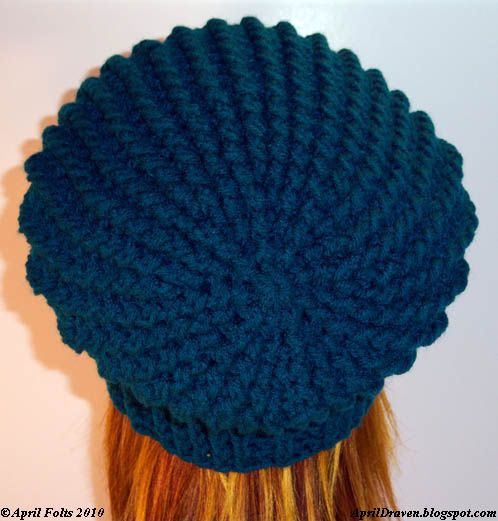
After making the purple slouch hat I wanted to make another one, but I wanted this one to be warm because it's cold in Michigan right now.
I have this pattern available for $3.00 in My Etsy Shop if anyone is interested.


and here is what it looks like if you just want a plain winter hat


What do you think?


Sunday, January 3, 2010

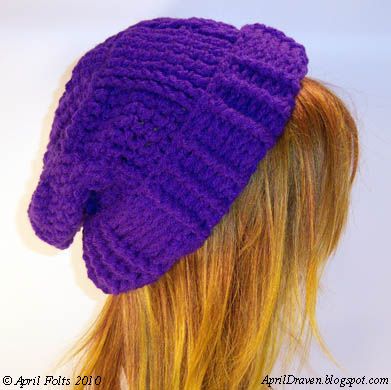
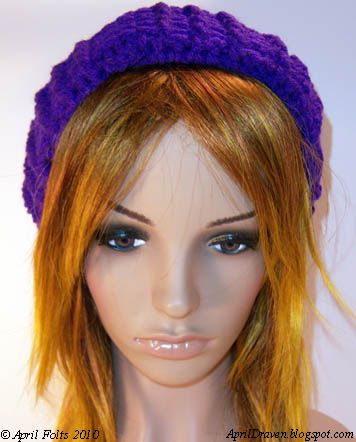
Pretty Purple Cable Slouch Hat

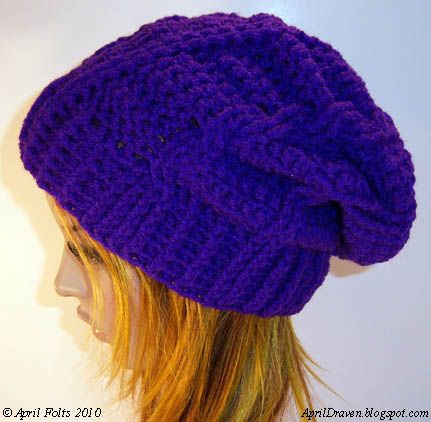
Ok so I am horrible at picking names for hats LOL. I was watching the newest episode of Doctor Who and at the end Rose had this awesome slouchy purple hat. I immediately wanted one. I wanted mine more elaborate though. I already made a Cable Fae Slouch Hat so I figured I would combine the two ideas. Slouch with Cables. I usually don't model my own hats but I needed a new profile pic so I figured why not kill two birds with one stone lol. What do you think?


If you purchased this pattern and don't know how to do the *Cable Cross* Here is a link to a video that should help:
(Cable Cross: Here is a video I found on how to do the Cable Cross *it isn't really called that I don't think*)

I have the pattern available for $3.00 in My Etsy Store if anyone is interested.


Wednesday, December 30, 2009

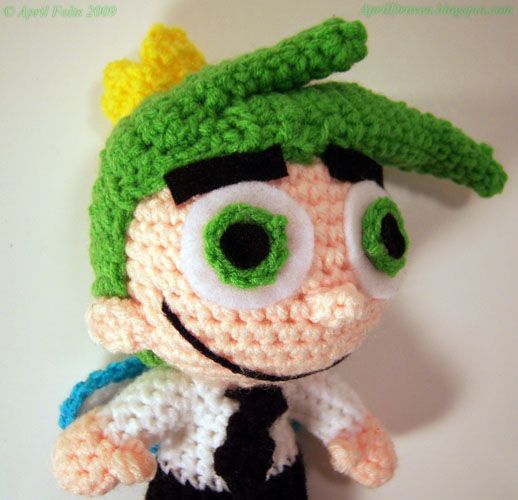
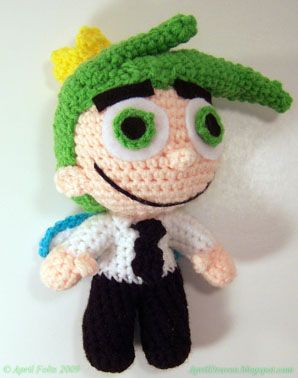
Cosmo and Wanda Crochet Dolls

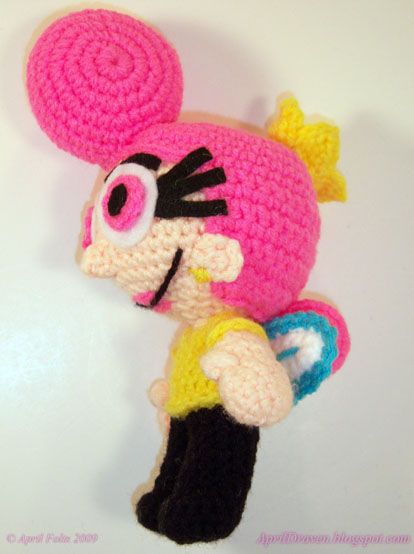
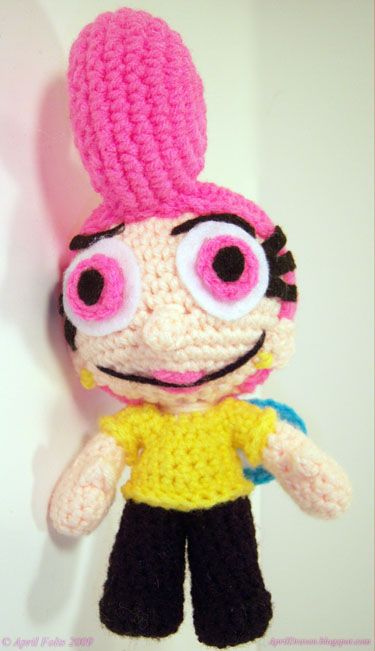
I absolutely adore Fairly Odd Parents or more specifically Cosmo and Wanda :) My Daughter loves the show too so I had to make them. I took my Princess Paige Doll Pattern (I have it for sale in My Store) and made some adjustments. If you can't see the pics right click on the picture and select view picture. What do you think?


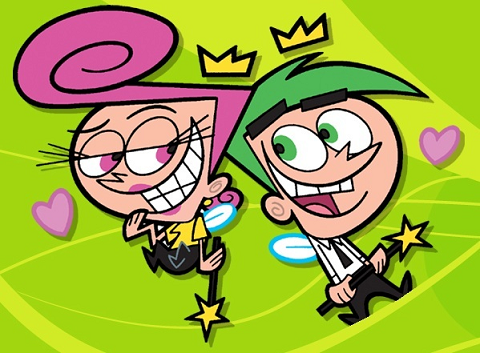
For those of you who don't know what they are supposed to look like here is a pic :)


Here are the adjustments. These are meant to go with This Pattern
Cosmo Colors:
Hair: Green
Shirt: White with black tie
Pants Black

Wanda Colors:
Hair: Pink
Shirt: Yellow
Pants: Black

Cosmo

Arms: Switch colors after RND 5

Shirt Collar: after the Arm section, attach white yarn to the front middle and crochet around, do not join, ch 1, turn, sc

back around, FO with a long tail, fold collar down and sew down onto shirt. Then attach head.

Tie:
Rnd 1: ch 3, turn, 2 sc, ch 1, turn
Rnd 2-7: 2 sc, ch 1, turn
Rnd 8: sc2tog 1 time
FO with a long tail
weave tail back up piece and fold the top down a couple rows and sew down. thread tail through collar and attach to the other

side securing the tie.

Hair:

Follow 1st part of Hair on pattern

Pt 2:

Large chunk of Hair:
Work in the round
Rnd 1: 4 sc in ring,
Rnd 2: 4 sc
Rnd 3: 2 sc in each sc around (8)
Rnd 4: 8 sc
Rnd 5: *1 sc, 2 sc in next sc* rep from * to * around (12)
Rnd 6: 12 sc
Rnd 7: *2 sc, 2 sc in next sc* rep from * to * around (16)
Rnd 8: 16 sc
Rnd 9: *3 sc, 2 sc in next sc* rep from * to * around (20)
Rnd 10: 20 sc
Rnd 11: *4 sc, 2 sc in next sc* rep from * to * around (24)
Rnd 12: 24 sc
Rnd 13: *5 sc, 2 sc in next sc* rep from * to * around (28)
No longer worked in round
Row 1-4: 15 sc, ch 1, turn
do not stuff

Small Chunk of Hair:
Work in the round
Rnd 1: 4 sc in ring,
Rnd 2: 4 sc
Rnd 3: 2 sc in each sc around (8)
Rnd 4: 8 sc
Rnd 5: *1 sc, 2 sc in next sc* rep from * to * around (12)
Rnd 6: 12 sc
Rnd 7: *2 sc, 2 sc in next sc* rep from * to * around (16)
Rnd 8: 16 sc
Rnd 9: *3 sc, 2 sc in next sc* rep from * to * around (20)
No longer worked in round
Row 10-13: 15 sc, ch 1, turn
do not stuff
sew to head

Wanda:

Hair:
Follow 1st part of Hair on pattern

Large Swirl:

Rnd 1: Work 8 sc in first ch
Rnd 2: 2 sc in each sc (16)
Rnd 3: *Sc in next sc, 2 sc in next sc*, rep from * to * around (24)
Rnd 4: *Sc in next 2 sc, 2 sc in next sc*, rep from * to * around (32)
Rnd 5-8: Sc in each sc around (4 rounds)
Rnd 9:*2 sc, Sc2tog*, rep from * to * around (24)
Rnd 10: *1 sc, Sc2tog*, rep from * to * around (16)
Rnd 11: sc2tog 11 times

Small Swirl:

Rnd 1: Work 8 sc in first ch
Rnd 2: 2 sc in each sc (16)
Rnd 3&4: sc in each sc around (2 rounds)
Rnd 5: sc2tog 11 times

Ears:

ch 7, sc in 2nd ch from hook, 6 sc, FO and fold in half, sew middle together. For wanda sew earrings on with yellow

Crown:
Rnd 1: Work 8 sc in first ch
Rnd 2: 2 sc in each sc (16)
no longer worked in round
Row 1&2: 4 sc, ch 1, turn
Row 3: sc2tog 2 times
Row 4: sc2tog 1 time
ss down the side and repeat rows 1-4 3 more times
fold edges toward the middle and sew sides together a couple stitches, forming the crown

Wings:
ch 7, turn, sc in 2nd ch from hook (back loop only) 5 sc, sc 3 stitches in the 6th sc spot, turn and sc down the other side,

ch 1 turn, 7 sc, 3 in next space, 6 sc back down the other side, FO, attach blue and sc around entire piece, Stitch blue line in the middle of the wing. attach to doll.

Nose: attach skin color yarn to face and sc 3 stitches across then down 1 and back 2 forming a circle, join with 1 ss, dec around, FO

Face:
Black and White Felt
Glue Gun

If you want to make them have wands you can use a pipe cleaner and some Yellow felt or some yellow foam. Just an idea ;)

If you have any trouble by all means let me know and I will try my best to help :)

*************************************************************************************
Happy New Year Everyone!
**********************************************************************
Creative Commons License
This work by April Folts is licensed under a Creative Commons Attribution-Noncommercial-No Derivative Works 3.0 United States License.

Saturday, December 26, 2009

Princess Paige Doll

This is my newest creation. I had to wait until after Yule to post because I made this for my Daughter. She has red hair and blue eyes so I made the doll to look like her. She loves it. The pattern is available at My Etsy Store if anyone is interested.


Here is her opening it :)


I also made her an Orange Star


Here is her right after she opened it