Sunday, February 15, 2009

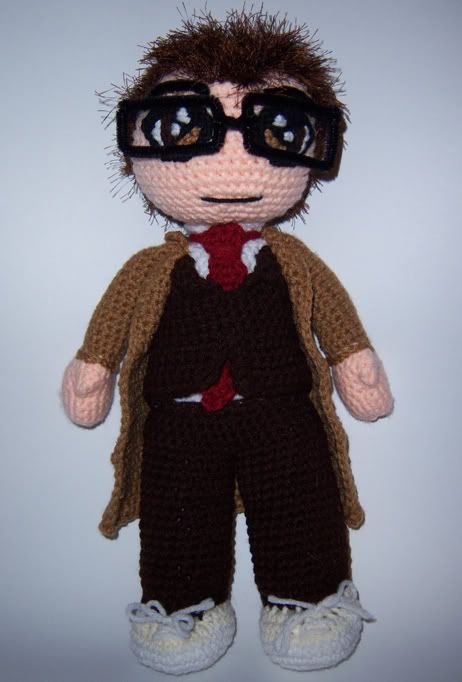
Doctor Who Crochet Doll

*********UPDATE 11-17-09*********
Yay this is now featured on Geek Crafts Oh there is one tiny little correction I would like to add. The Glasses are pipe cleaners they aren't crocheted. They kinda do look crocheted at first glance though :D
**********************************

I made this Doctor Who doll for my swap partner on Craftster. He is now hers to love :D


The adjustments to make this doll are here

Wednesday, January 21, 2009

Edward

I finally made an Edward doll (Edward Cullen from Twilight) :D I always pictured him in warmer colors because of how sweet and gentle he is.
**********I have the Pattern at My Etsy Store**********
Yay more good news. My Edward was featured on craftster's January 2009 featured crochet projects


Thursday, April 3, 2008

FREE crochet GIR pattern

Doom Doom Doom Doom
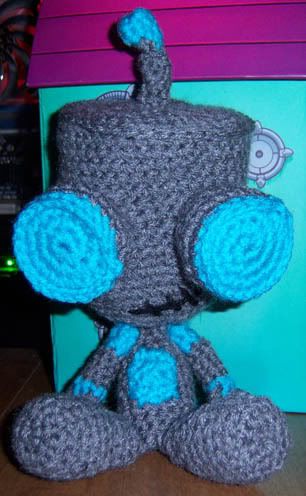
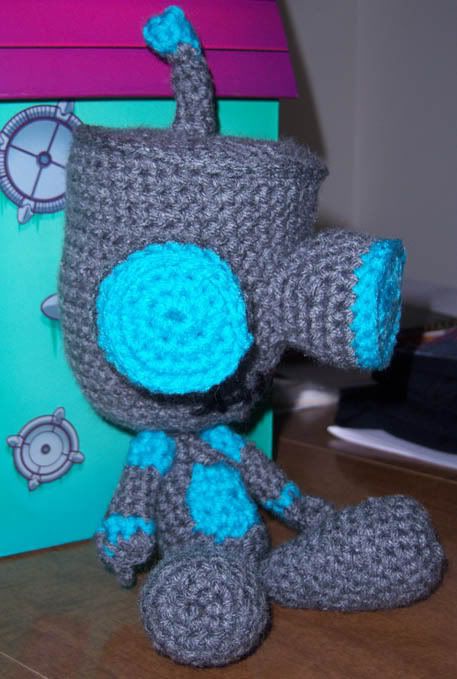
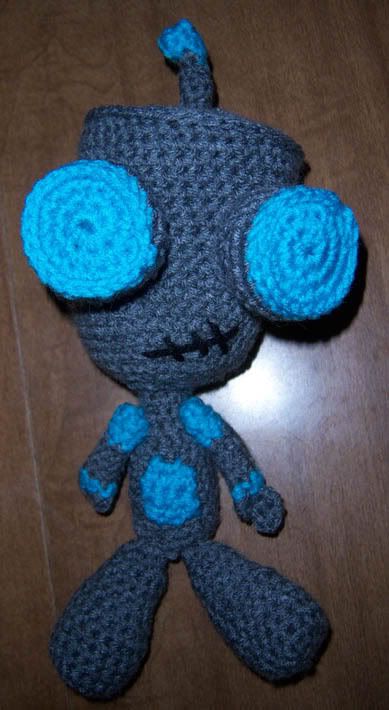
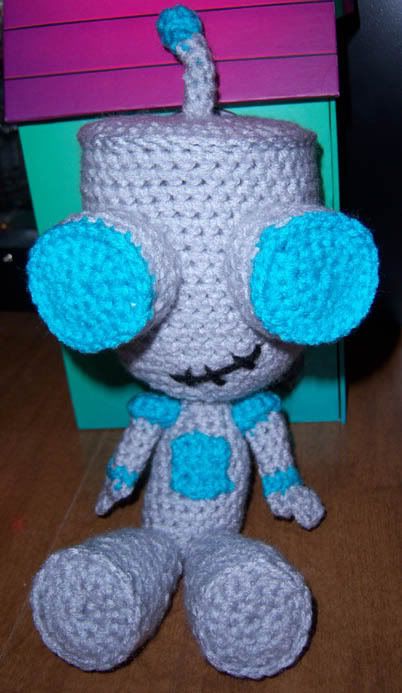
ok I know other people have made a crochet Gir but I haven't been able to find a pattern. Plus I'm never happy unless I do it myself. DIY all the way. so here are some pics. I didn't have the lighter grey that is why he looks a bit dark.


This is the 2nd Gir I made. I made the shoulders bigger, I crocheted around the feet, & I found some grey yarn that was the perfect color :) The pattern below has all the changes in it.

ok you want the pattern??
do a little dance............
doot doot do dee do doot do do
LOL


ok here ya go:

Free GIR crochet pattern
By: April Folts
For personal use only

Hook size: 3.25mm
Gauge: 17 sc = 4 inches
Yarn: Acrylic
STITCH EXPLANATION:
sc2tog (sc dec) (Insert hook into next st and draw up a loop) twice, yarn over and draw through all 3 loops on hook – 1 sc decreased.
ss = slip stitch
sc = single crochet
ch = chain
Rnd = round
YO = yarn over
FO = Fasten off

Materials:
Acrylic Yarn colors:
Grey and Blue

Notes:
Pattern is worked in rounds except when specified different.
Use marker to indicate beginning of Rnds.


Head & Body

With Grey ch 1
Rnd 1: Work 8 sc in first ch
Rnd 2: 2 sc in each sc (16)
Rnd 3: *Sc in next sc, 2 sc in next sc*, rep from * to * around (24)
Rnd 4: *Sc in next 2 sc, 2 sc in next sc*, rep from * to * around (32)
Rnd 5: *Sc in next 3 sc, 2 sc in next sc*, rep from * to * around (40)
After completing round 6
Disc: draw a circle around your circle to make a pattern, then cut out a piece of cardboard or something stiff like plastic canvas
that way his head will be flat.
Rnd 6-23: Sc in each sc around (17 rounds)
Insert disc
Rnd 24: *Sc in next 3 sc, Sc2tog*, rep from * to * around (32)
Rnd 25: *Sc in next 2 sc, Sc2tog*, rep from * to * around (24)
Rnd 26: *Sc in next 1 sc, Sc2tog*, rep from * to * around (16)
stuff
Rnd 27: sc2tog 8 times
Rnd 28-30: Sc in each sc around (3 rounds) (8)
Rnd 31: *Sc in next sc, 2 sc in next sc*, rep from * to * around (12)
Rnd 32: *Sc in next 2 sc, 2 sc in next sc*, rep from * to * around (16)
Rnd 33-39: Sc in each sc around (7 rounds)
Stuff
RND 40: *Sc in next 2 sc, Sc2tog*, rep from * to * around (12)
RND 41: *Sc in next sc, Sc2tog*, rep from * to * around (8)
RND 42: Sc2tog 2 times
weave hole shut

FEET (make 2)

With Grey ch 1
Rnd 1: Work 8 sc in first ch
Rnd 2: 2 sc in each sc (16)
Disc: Draw a circle around your circle to make a pattern, then cut out a piece of cardboard or something stiff like plastic canvas
Rnd 3-7: sc in each sc around (5 rounds)
Rnd 8: *Sc in next sc, Sc2tog*, rep from * to * around (11)
Insert disc
Stuff
Rnd 9-11: sc in each sc around (3 rounds)
Stuff
Rnd 12: Sc2tog 5 times
Rnd 13: 6 sc
Add a little bit of stuffing and weave hole shut
FO with a long tail to sew to body

ARM (make 2)

With Blue ch 1
Rnd 1: Work 6 sc in first ch
Rnd 2: 2 sc in each sc (12)
Rnd 3: sc2tog 6 times
Attach Grey
Rnd 4-7: sc in each sc around (4 rounds)
Attach blue
Rnd 8: sc in each sc around (1 round)
FO and hide all the ends inside arm
no need to stuff :)
Take the end of the arm and squeeze flat, 4 sc across the end going through both sides closing the arm.
Ch 1, 2 sc, ch 1, turn, sc2tog
Weave loose ends into arm
Attach to body

Square on stomach

With Blue
Row 1: ch 4, sc in second ch from hook, sc in each sc across, ch 1, turn
Row 2&3: sc in each sc across, ch 1, turn
FO
Sew to body

Eyes (make 2)

With Blue ch 1
Rnd 1: Work 8 sc in first ch
Rnd 2: 2 sc in each sc (16)
Disc: Draw a circle around your circle to make a pattern, then cut out a piece of cardboard or something stiff like plastic canvas
Rnd 3: *Sc in next sc, 2 sc in next sc*, rep from * to * around (24)
Attach grey
Rnd 4 & 5: sc in each sc around (2 rounds)
Rnd 6: *Sc in next sc, Sc2tog*, rep from * to * around (16)
Insert disc
Rnd 7 & 8: sc in each sc around (2 rounds)
Stuff

Antenna

With Blue ch 1
Rnd 1: Work 6 sc in first ch
Rnd 2: sc in each sc around (6)
Rnd 3: Sc2tog, 4 sc (5)
Attach grey
Rnd 4-9: sc in each sc around (6 rounds)
FO with a long tail to sew to body.

Finishing touches:

Take Blue and sc around the blue in the eyes all around forming a ridge. (See Picture) Also take Grey and sc all around the top of his head. Do the same to the feet if you want to. I was in a hurry when I made him so I forgot to do that to the feet.

**********************************************************************
Creative Commons License
This work by April Folts is licensed under a Creative Commons Attribution-Noncommercial-No Derivative Works 3.0 United States License.

*******************************************************************************
Any donations are welcome and appreciated.


Sunday, February 17, 2008

Homemade DIY Baby Wipes

If you can't see the pictures right click on them and select view image :)


Saturday, November 10, 2007

Free Jack Skellington Crochet Pattern

Jack Skellington free crochet pattern is for personal use only


I hope you all can follow this. Enjoy!
********************UPDATE*************************
This is the IMPROVED PATTERN as of 6-28-2009
***************************************************
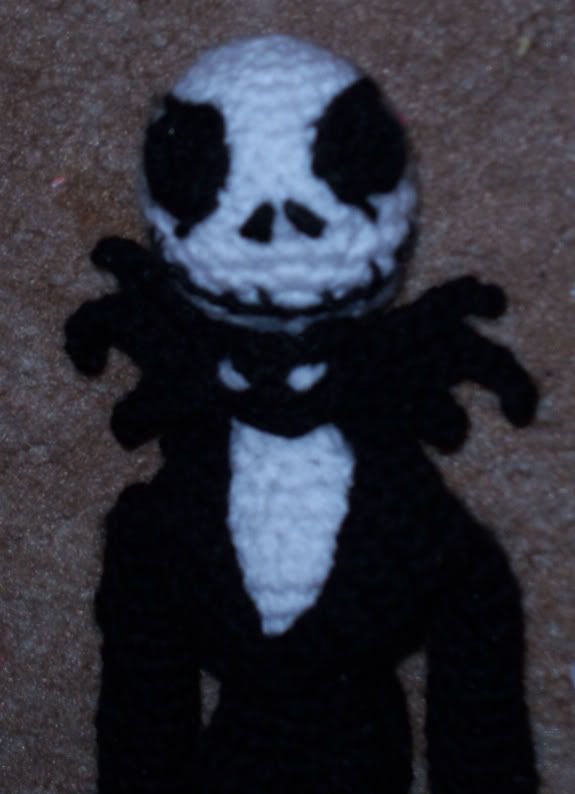
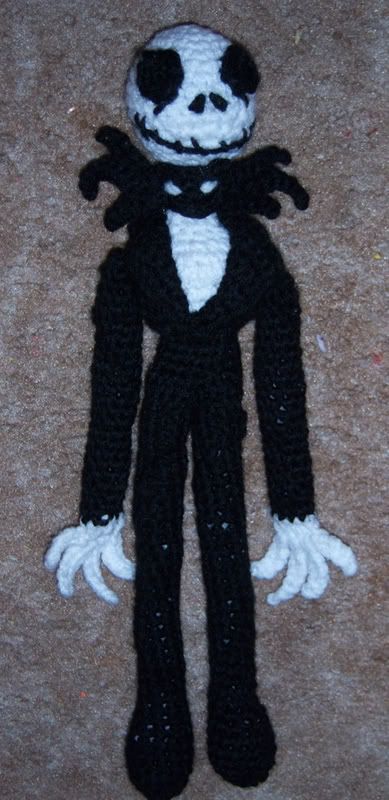

Jack Skellington
By: April Folts

Hook size: steel 2.75mm
Yarn: Acrylic
Approximate size:
Height: 15 inches

STITCH EXPLANATION:
sc2tog (sc dec) (Insert hook into next st and draw up a loop) twice, yarn over and draw through all 3 loops on hook – 1 sc decreased.
ss = slip stitch
sc = single crochet
ch = chain
Rnd = round
YO = yarn over
FO = Fasten off

Materials:
Acrylic Yarn colors:
White and Black

NOTES:
Pattern is worked in rounds except when specified different.
Use marker to indicate beginning of Rnds.

Feet and Legs (make 2)
With Black ch 1
Rnd 1: Work 4 sc in first ch
Rnd 2: 2 sc in each sc (8)
Rnd 3: *Sc in next sc, 2 sc in next sc*, rep from * to * around (12)
Rnd 4-6: Sc in each sc around (3 rounds)
Rnd 7: Sc2tog 2 times, 8 sc (10)
(Stuff while crocheting. It is easier than stuffing at the end)
Rnd 8-35: Sc in each sc around (27 rounds)
FO

Body
I apparently didn’t write the stitch count here so if anyone wants to help and tell me what it is I would be most grateful.
With Black
Rnd 1: Hold the two legs together and stitch the inner legs together (the crotch) and then sc around both legs for beginning the body.
Rnd 2-5: Sc in each sc around (4 rounds)
Rnd 6: *Sc in next sc, 2 sc in next sc*, rep from * to * around
Switch to White
Rnd 7: *Sc in next sc, 2 sc in next sc*, rep from * to * around
Rnd 8 & 9: Sc in each sc around (2 rounds)
Rnd 10: *Sc in next sc, Sc2tog*, rep from * to * around
Rnd 11: Sc in each sc around (1 round)
Rnd 12: *Sc in next sc, Sc2tog*, rep from * to * around
Lightly stuff
Rnd 13: Sc2tog around
Rnd 14-16: Sc in each sc around (3 rounds)
FO

Jacket Front (Make 2)
This is NOT worked in Rounds
Row 1: Ch 10, turn, sc in 2nd chain from hook
Row 2-9: Sc in each sc across (8 rows)
FO

Jacket Back
This is NOT worked in Rounds
Row 1: Ch 10, turn, sc in 2nd chain from hook
Row 2-11: Sc in each sc across (10 rows)
FO

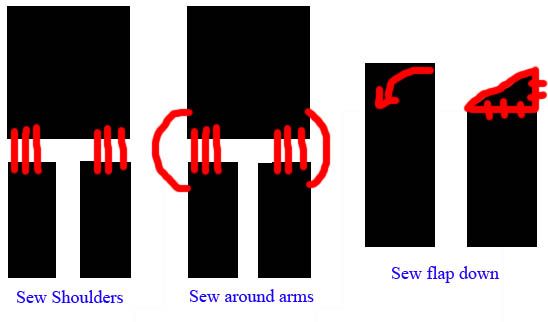
(A) (see picture for construction)

Head
With White ch 1
Rnd 1: Work 4 sc in first ch
Rnd 2: 2 sc in each sc (8)
Rnd 3: *Sc in next sc, 2 sc in next sc*, rep from * to * around (12)
Rnd 4: *Sc in next 2 sc, 2 sc in next sc*, rep from * to * around (16)
Rnd 5: *Sc in next 3 sc, 2 sc in next sc*, rep from * to * around (20)
Rnd 6: *Sc in next 4 sc, 2 sc in next sc*, rep from * to * around (24)
Rnd 7-10: Sc in each sc around (4 rounds)
Rnd 11: *Sc in next 4 sc, Sc2tog*, rep from * to * around (20)
Rnd 12: *Sc in next 3 sc, Sc2tog*, rep from * to * around (16)
Rnd 13: *Sc in next 2 sc, Sc2tog*, rep from * to * around (12)
Stuff
Rnd 14: *Sc in next 2 sc, Sc2tog*, rep from * to * around (8)
FO & weave hole shut

Eyes (make 2)
With Black ch 1
Rnd 1: Work 4 sc in first ch
Rnd 2: 2 sc in each sc (8)
Rnd 3: *Sc in next sc, 2 sc in next sc*, rep from * to * around (12)
Attach to face

Arms & Hands (make 2)
With Black ch 8 and join with a ss
Rnd 1: ch 1, Sc in each sc around
Rnd 2-20: Sc in each sc around (8)
Switch to White
Rnd 21: Sc in each sc around (8)
Squeeze flat and Sc closed
(4 stitches jack has 4 fingers)
ch 5, sc back down, ss to next space
ch6, sc back down, ss to next space
ch8, sc back down, ss to next space
ch6, sc back down, ss to next space
FO
Stuff
(Attach arms then sew the jacket around the arms)

Tails of jacket
With Black
Attach yarn to back of jacket starting at an edge
6 sc across the middle of the back of the jacket
Ch 1, turn, sc across
Ch 10, sc back down just like the fingers
ss over 1, sc back up the same piece 7 stitches, Ch 6 turn and go back down
ss next space, ch 13, sc down, ss in next space and ch1, 7 sc up, ch 4, sc back down
FO
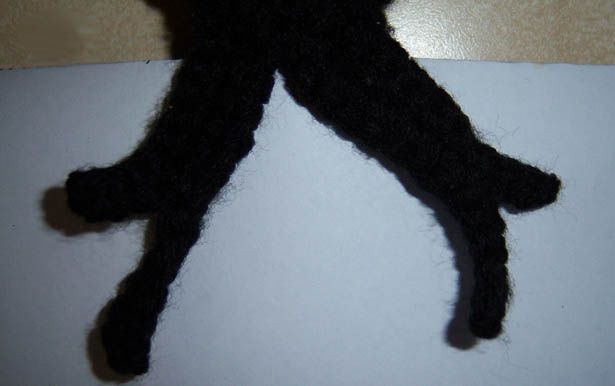
(B)(see Picture)

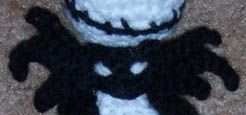
Bat Tie
With Black ch 1
Rnd 1: Work 4 sc in first ch
Rnd 2: 2 sc in each sc (8)
Ch 1, 2 sc, ss 3, ch1, 2 sc, ss 4, ch 1, 2 sc, turn, sc2tog,
ss to other side and do the same
Sew white eyes on the head
(C)(see Picture)
Attach black yarn to the side of the bat head, ch 6 and work down like the tails of the jacket
ss next space over, ch1 and work up 4 sc, ch 5, sc down, ss over 1 space, ch 1, work back up
3 sc, ch 3, work back down
FO
Do the same to the other side.
FO with a long tail for wrapping around the neck to hold the tie on him.

(A)
(B)
(C)

**********************************************************************
Creative Commons License
This work by April Folts is licensed under a Creative Commons Attribution-Noncommercial-No Derivative Works 3.0 United States License.